Manage Your Entities
This page is currently under review. Stay tuned!
You are able to gain insights from your data through topics. Topics are created with entities, which represent the data that builds them. It is important to define what each entity is called because you and your team will refer to them when talking to crystal to make sure she gives you the right insights.
Entities can be used across many topics: this is why there is a dedicated area to manage them all.
Let’s see how to deal with entity management.
The entity management panel
To open the entity management panel from the Self-Service Console click on the Entity management button in the upper-right corner of the page.
Entities are necessary to generate topics: if you have no topics yet this area will be empty.
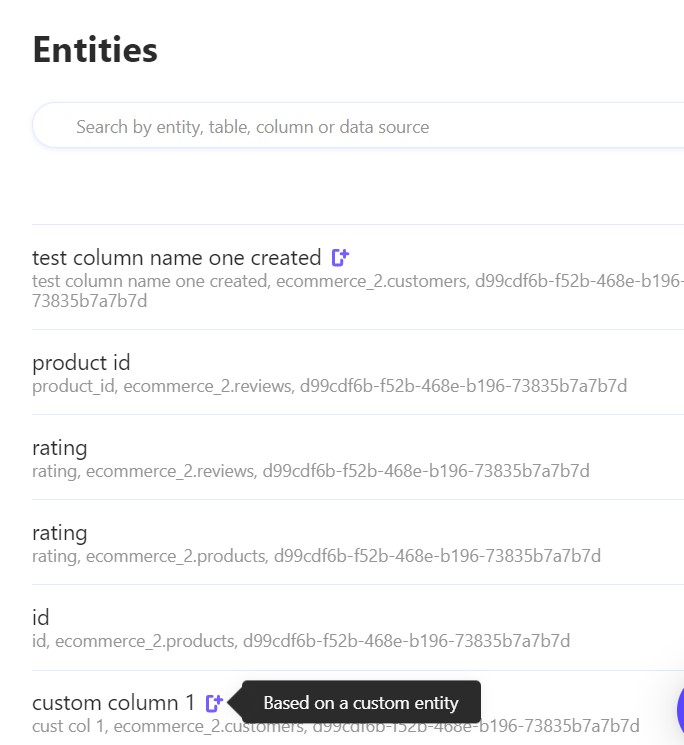
If you already have created topics, you will see a list of all the entities related to your topics. In the list, each entity will be referred to by the name of the primary alias and on the occasion of a multi-language project, also by the project's default language.
Under the entity name, there are specific details: the original column name, the table name, and the data source name from where it comes. When searching for a specific entity, to help narrow it down, you can search by any of these details.
If an entity belongs to a custom column, an icon will be displayed. You will be able to edit it as well:

Click on one of the entities to see its details. A new window will pop-up:
If you click on Topics using this entity, you will see the list of all the topics that use that entity as main entities or as a filters.
Entities can be used as the core of the topic to build it, or they can be used as filters to narrow down the core data. If your entity is used in a topic as a dynamic filter, and only, in this case, you will see the related row in the entity detail view.
The filter type will show you what kind of filter this entity is used for and helps the advisor to put your data in relationship with your requests for more accurate answers.
Back on the single entity detail view, you can see the language or languages your project is in and the status of the entity in those languages (complete, ready or to do).
For each language, you will see its aliases (or alternative names). The starred one is the default alias that the advisor will primarily use to refer to and, if this alias is a topic’s main entity, it would construct the topic’s name.
For example, if the default alias is “Sales” crystal will talk to you about “sales”, but if “earning” is also set as an alternative value, she will know what you are referring to if you ask her to show you 2019 earnings.
You can add or remove aliases and choose a different default alias. Let’s see how.
Add a new alias
To add a new alias, click on the button Edit in the single entity view.
You will enable the aliases editor: you can either add new aliases, by inserting them in the white field and cancel the already existing ones, by clicking on the X.
You can also decide to assign a different default alias to the entity by clicking on the star: the yellow star indicates the default word to be used by the advisor.
Remember that the more aliases you create for each entity, the easier will be for the advisor to understand the conversation.
Below the aliases, you will see Value aliasing, which allows you to also give aliases to every single value of the column. For example, if you have a column of countries and there are acronyms in the column, you may want to also insert the full name of the country, or vice versa, like the United States and US.
Please note that you can’t apply value aliases to numerical data.
If you click on the value aliasing row, you will see the following view:
Here you can see all the column values that are related to the entity and you can insert more aliases or cancel those already created. Click on Done to confirm the changes and get back to the main detail view where you can save all the changes you have made.
Then click on Save to enable your changes. Since editing an entity will impact all the related topics, you will get a confirmation message to remind you that such topics will be temporarily unavailable if you complete the changes.
In fact, the topics affected must be re-trained before they can be used again.
Remove an entity
Removing an entity is very simple. Just click on Delete in the lower part of the panel.
Since deleting an entity will impact all related topics, you will be asked to confirm before completing the cancellation, which will result in the temporary unavailability of the involved topics.
How can I modify entities that have already been trained?
You can modify existing entities from the entity management panel at any time. Remember that all the topics that use an entity will be retrained in the event it is modified, so they might be unavailable for a moment.
We hope this article helped you to know more about entities. Find some more useful information in the Topics section of our Resources!
Last updated
Was this helpful?