Enable the Microsoft Identity Provider
This page describes how to enable the Microsoft IDP for the Login.

To let Member Users log in to Crystal with their Microsoft credentials, the Admin User must first setup Microsoft Azure as an Identity Provider.
To do so, as an Admin, you must follow a process that involves both Azure and Crystal.
Please follow through this tutorial.
Step 1 - Add an app registration on the Microsoft Azure Portal
First, you need to log in to Microsoft Azure.
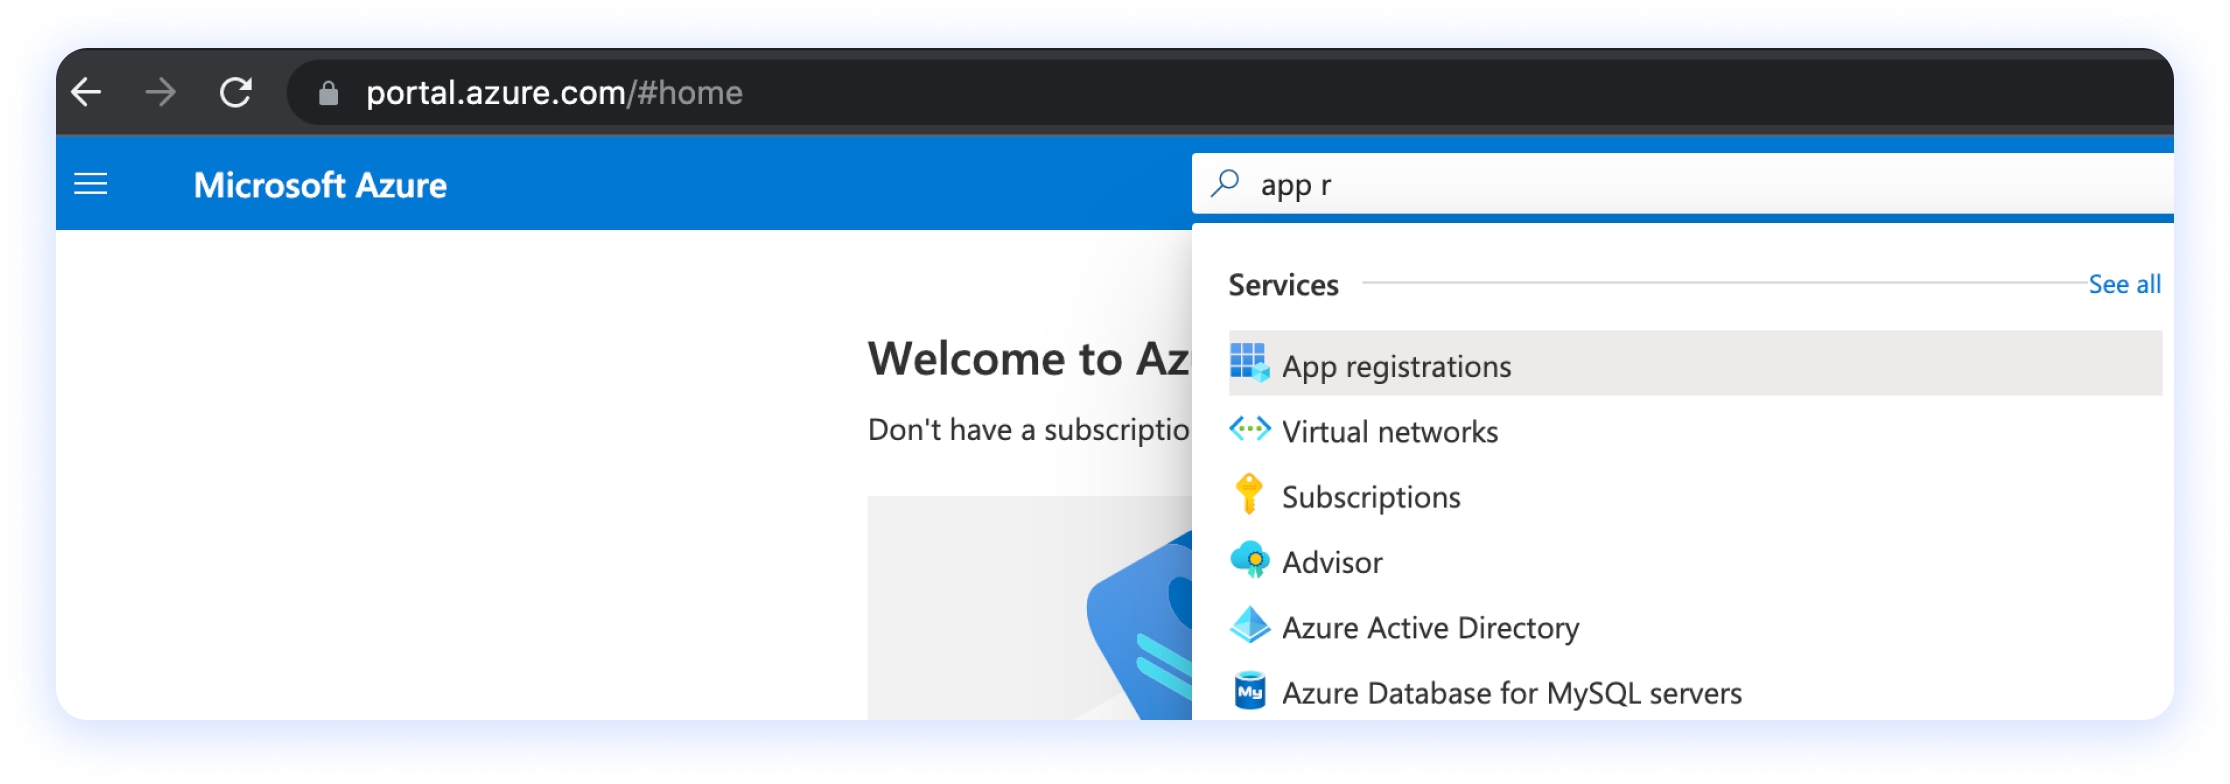
Then search for App registrations in the upper search bar.
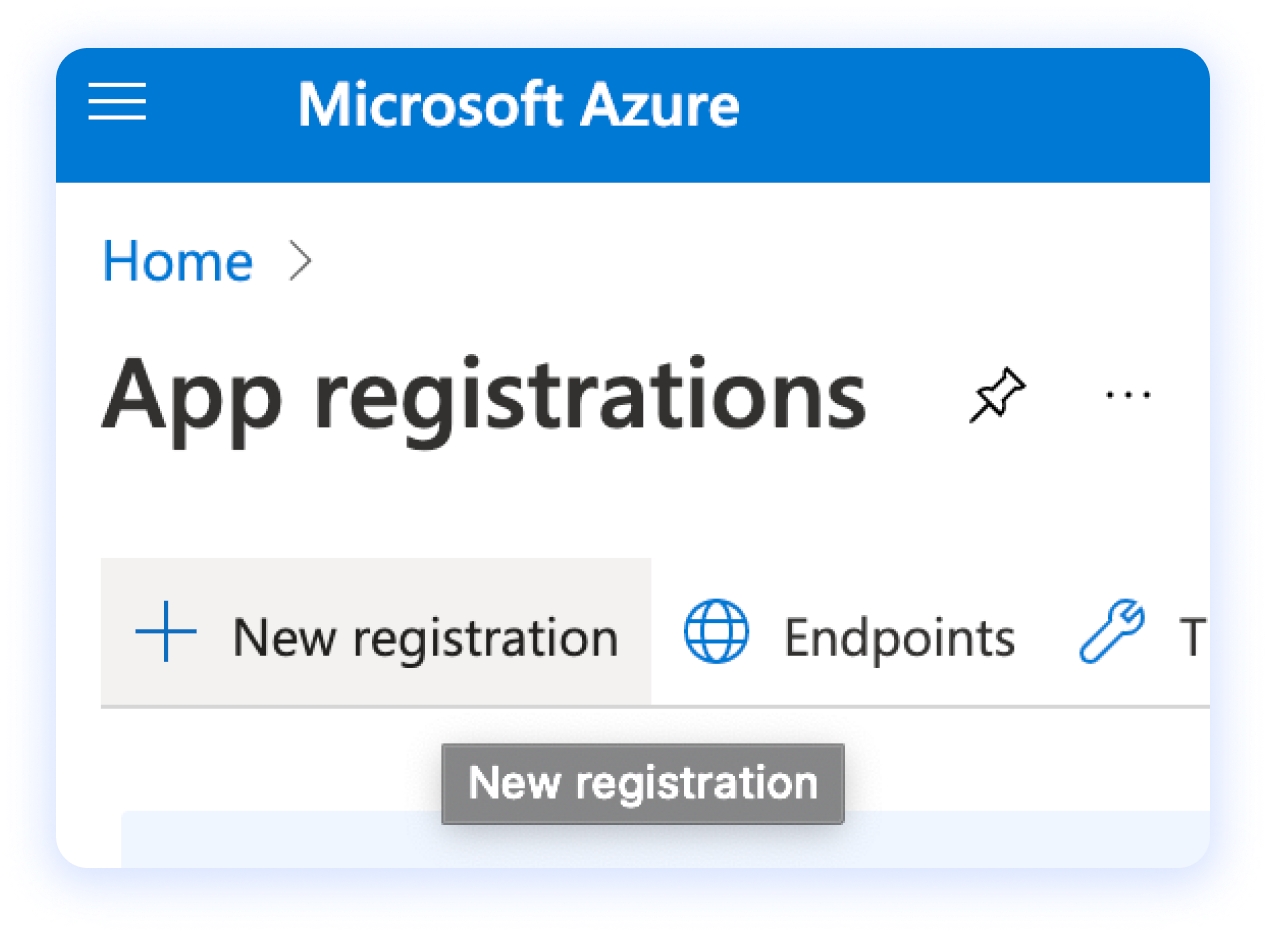
Now click on + New registration
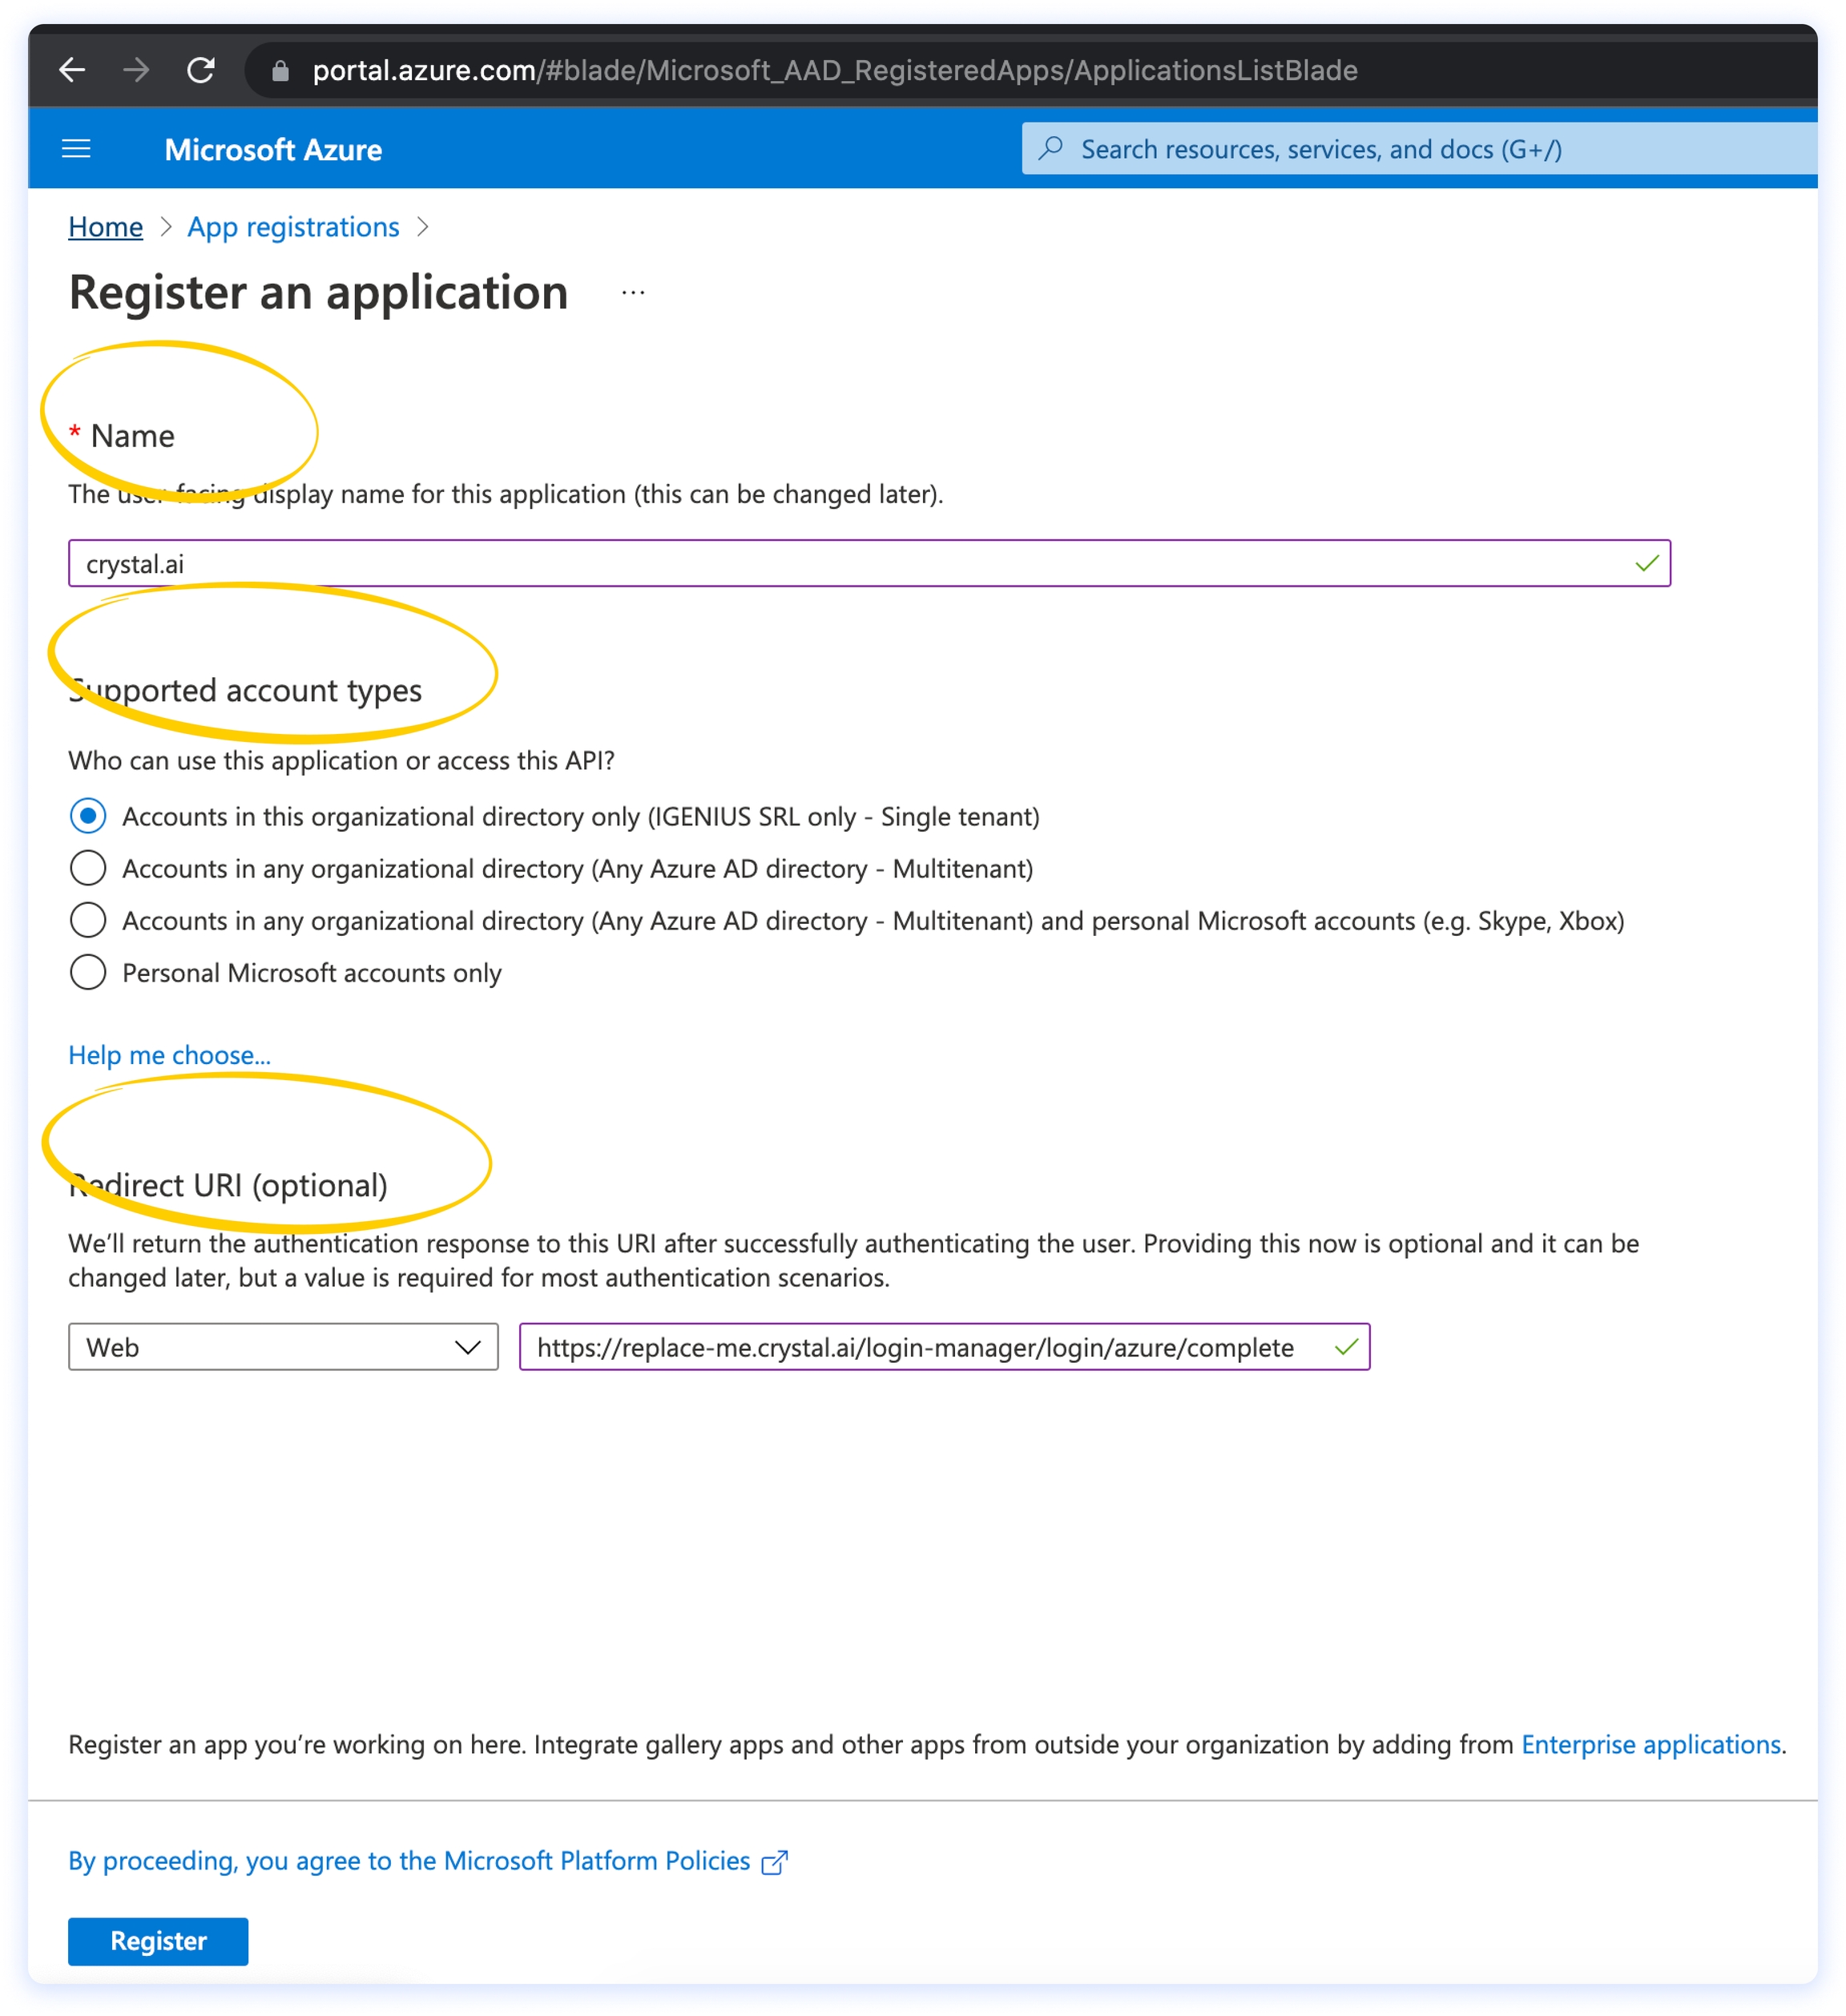
You will now need to fill in the App registration form through the following passages:
choose a name for registering the crystal app on Azure (for example, you might use crystal.ai);
select the correct account types that you want to support. If you choose Accounts on this organizational directory only, only the accounts registered in the current Azure AD will be able to login to crystal;
provide a redirect URI for OAuth2 (you can configure it later, but the structure should be: https://{your-crystal-tenant-name}.crystal.ai/login-manager/login/azure/complete).
Step 2 - Create a client secret for the App
After following the Step 1 instructions, you will be able to see your new App registration among the App registrations. You will now need to create a client secret, by following these steps:
On the left menu, click on Certificates & secrets.
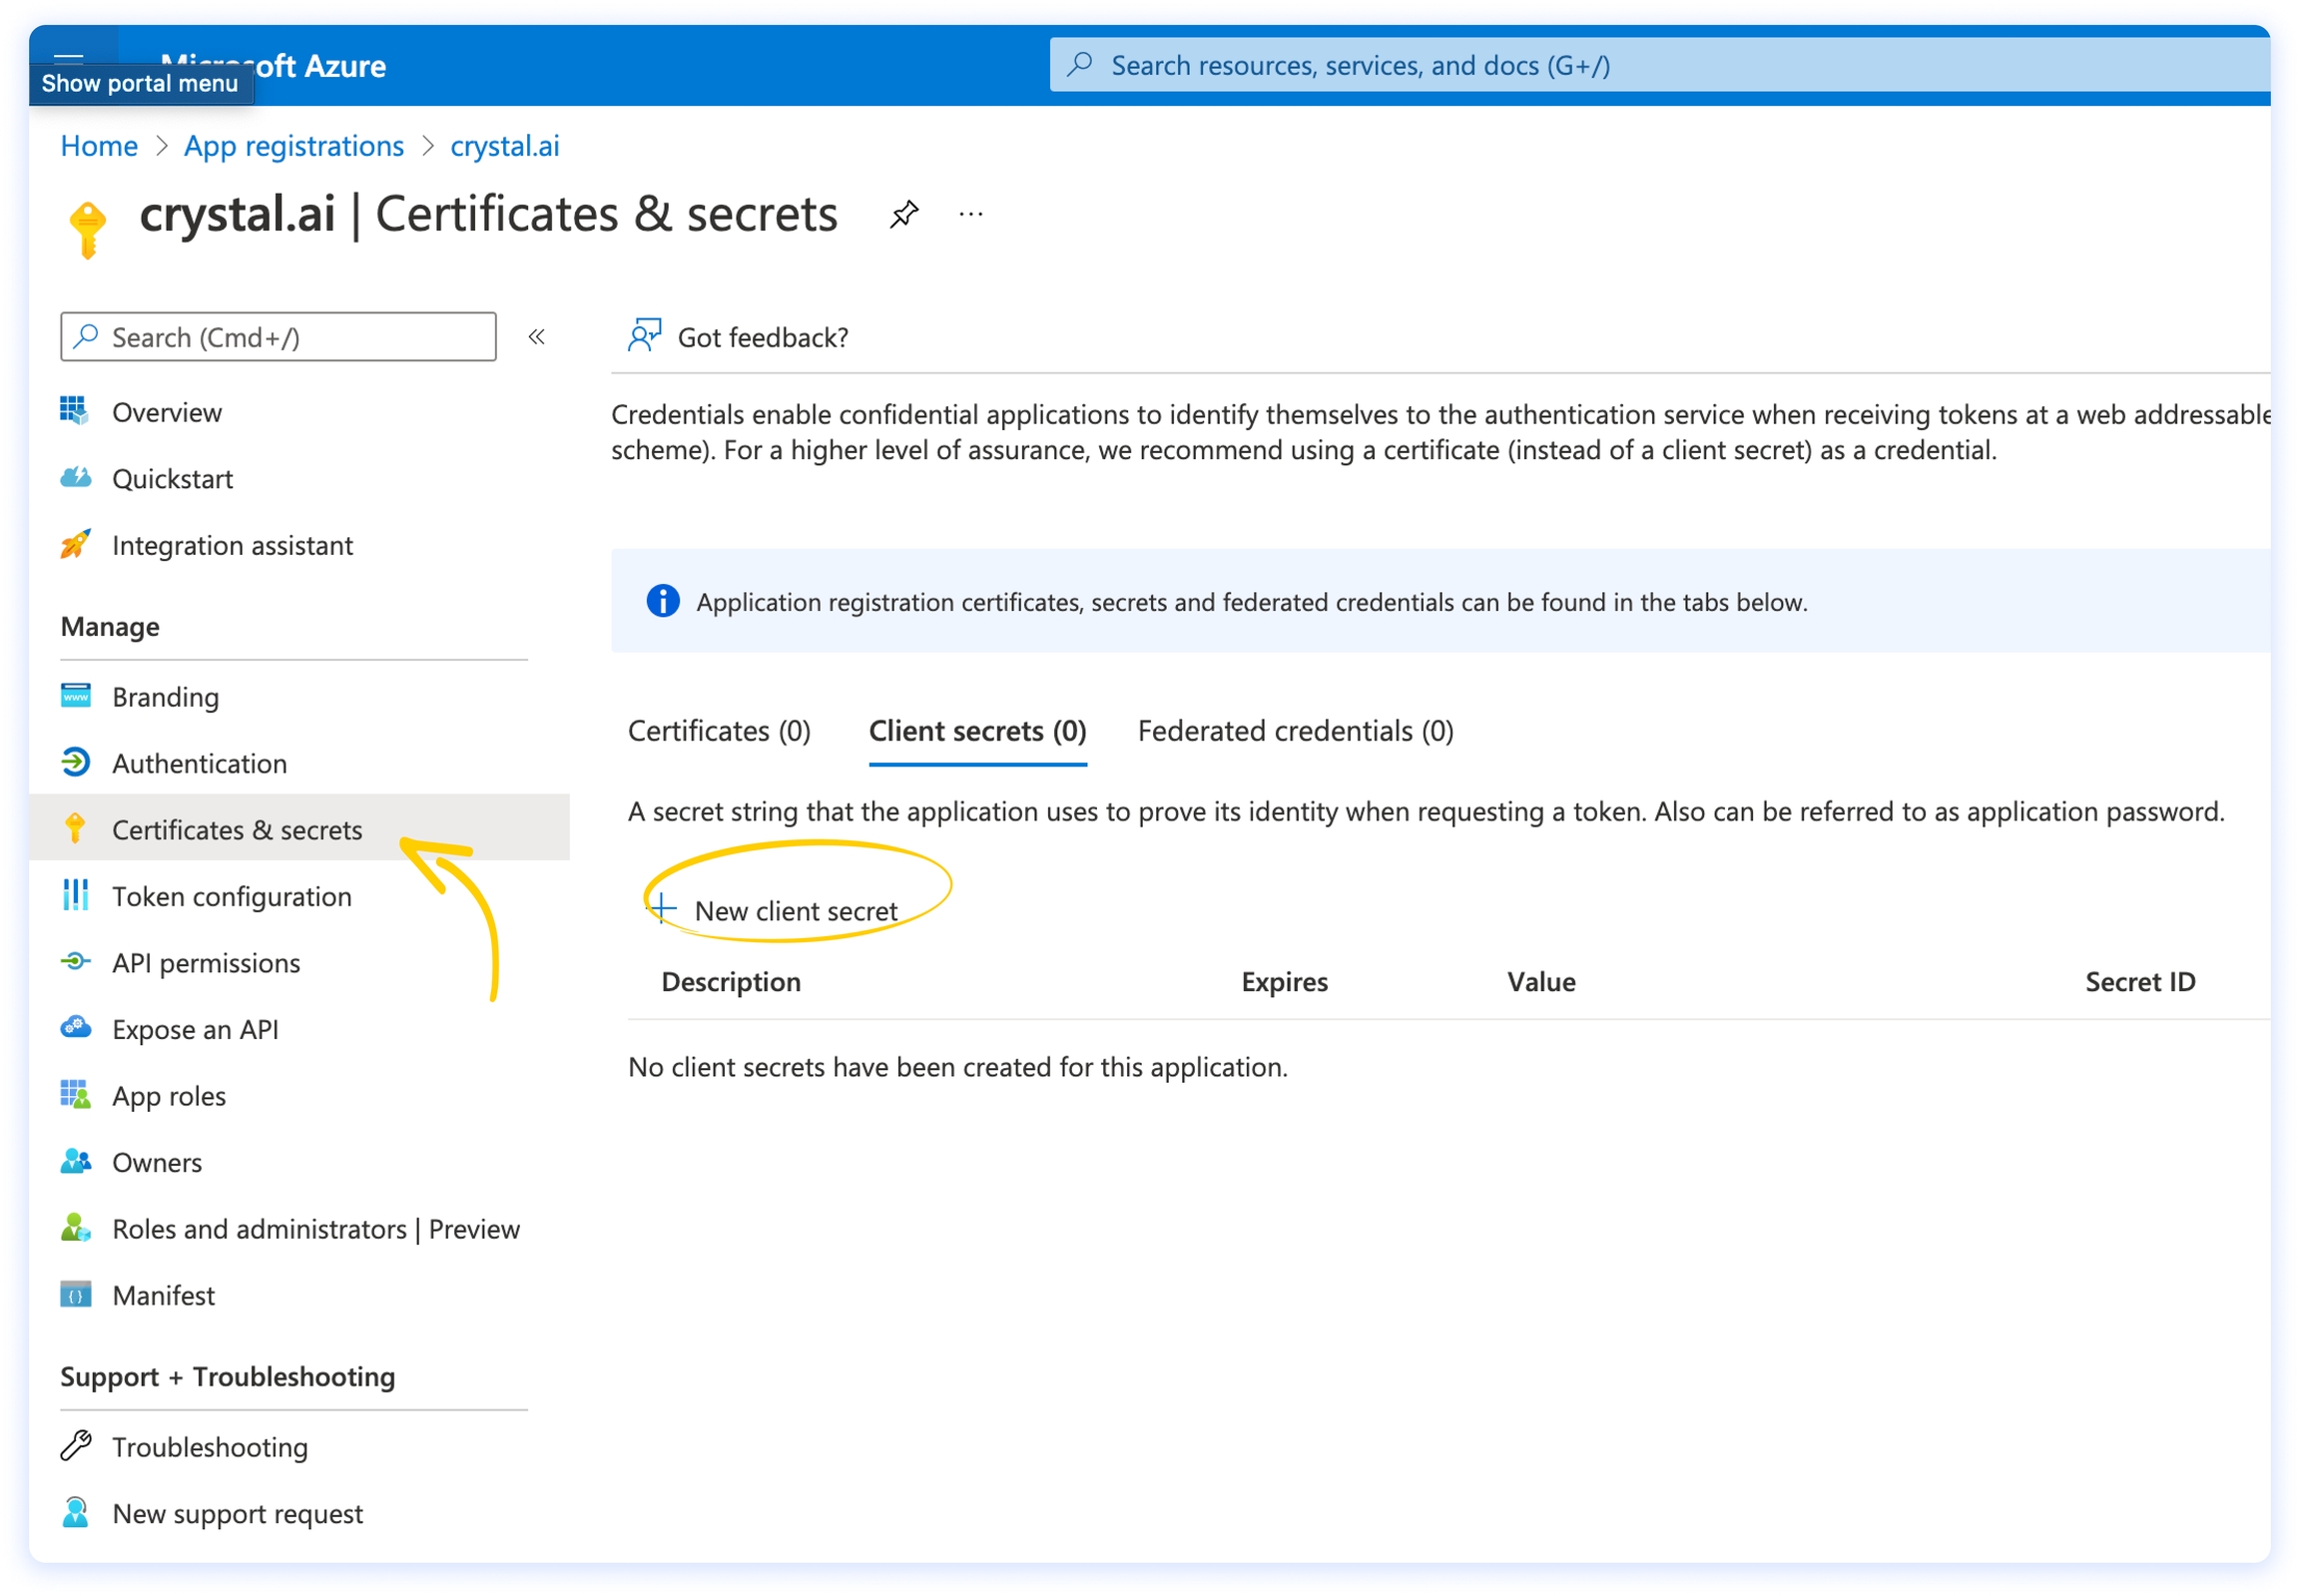
On the Client secrets tab, click on + New client secret, then choose a meaningful name and an expiration time that suits your needs.
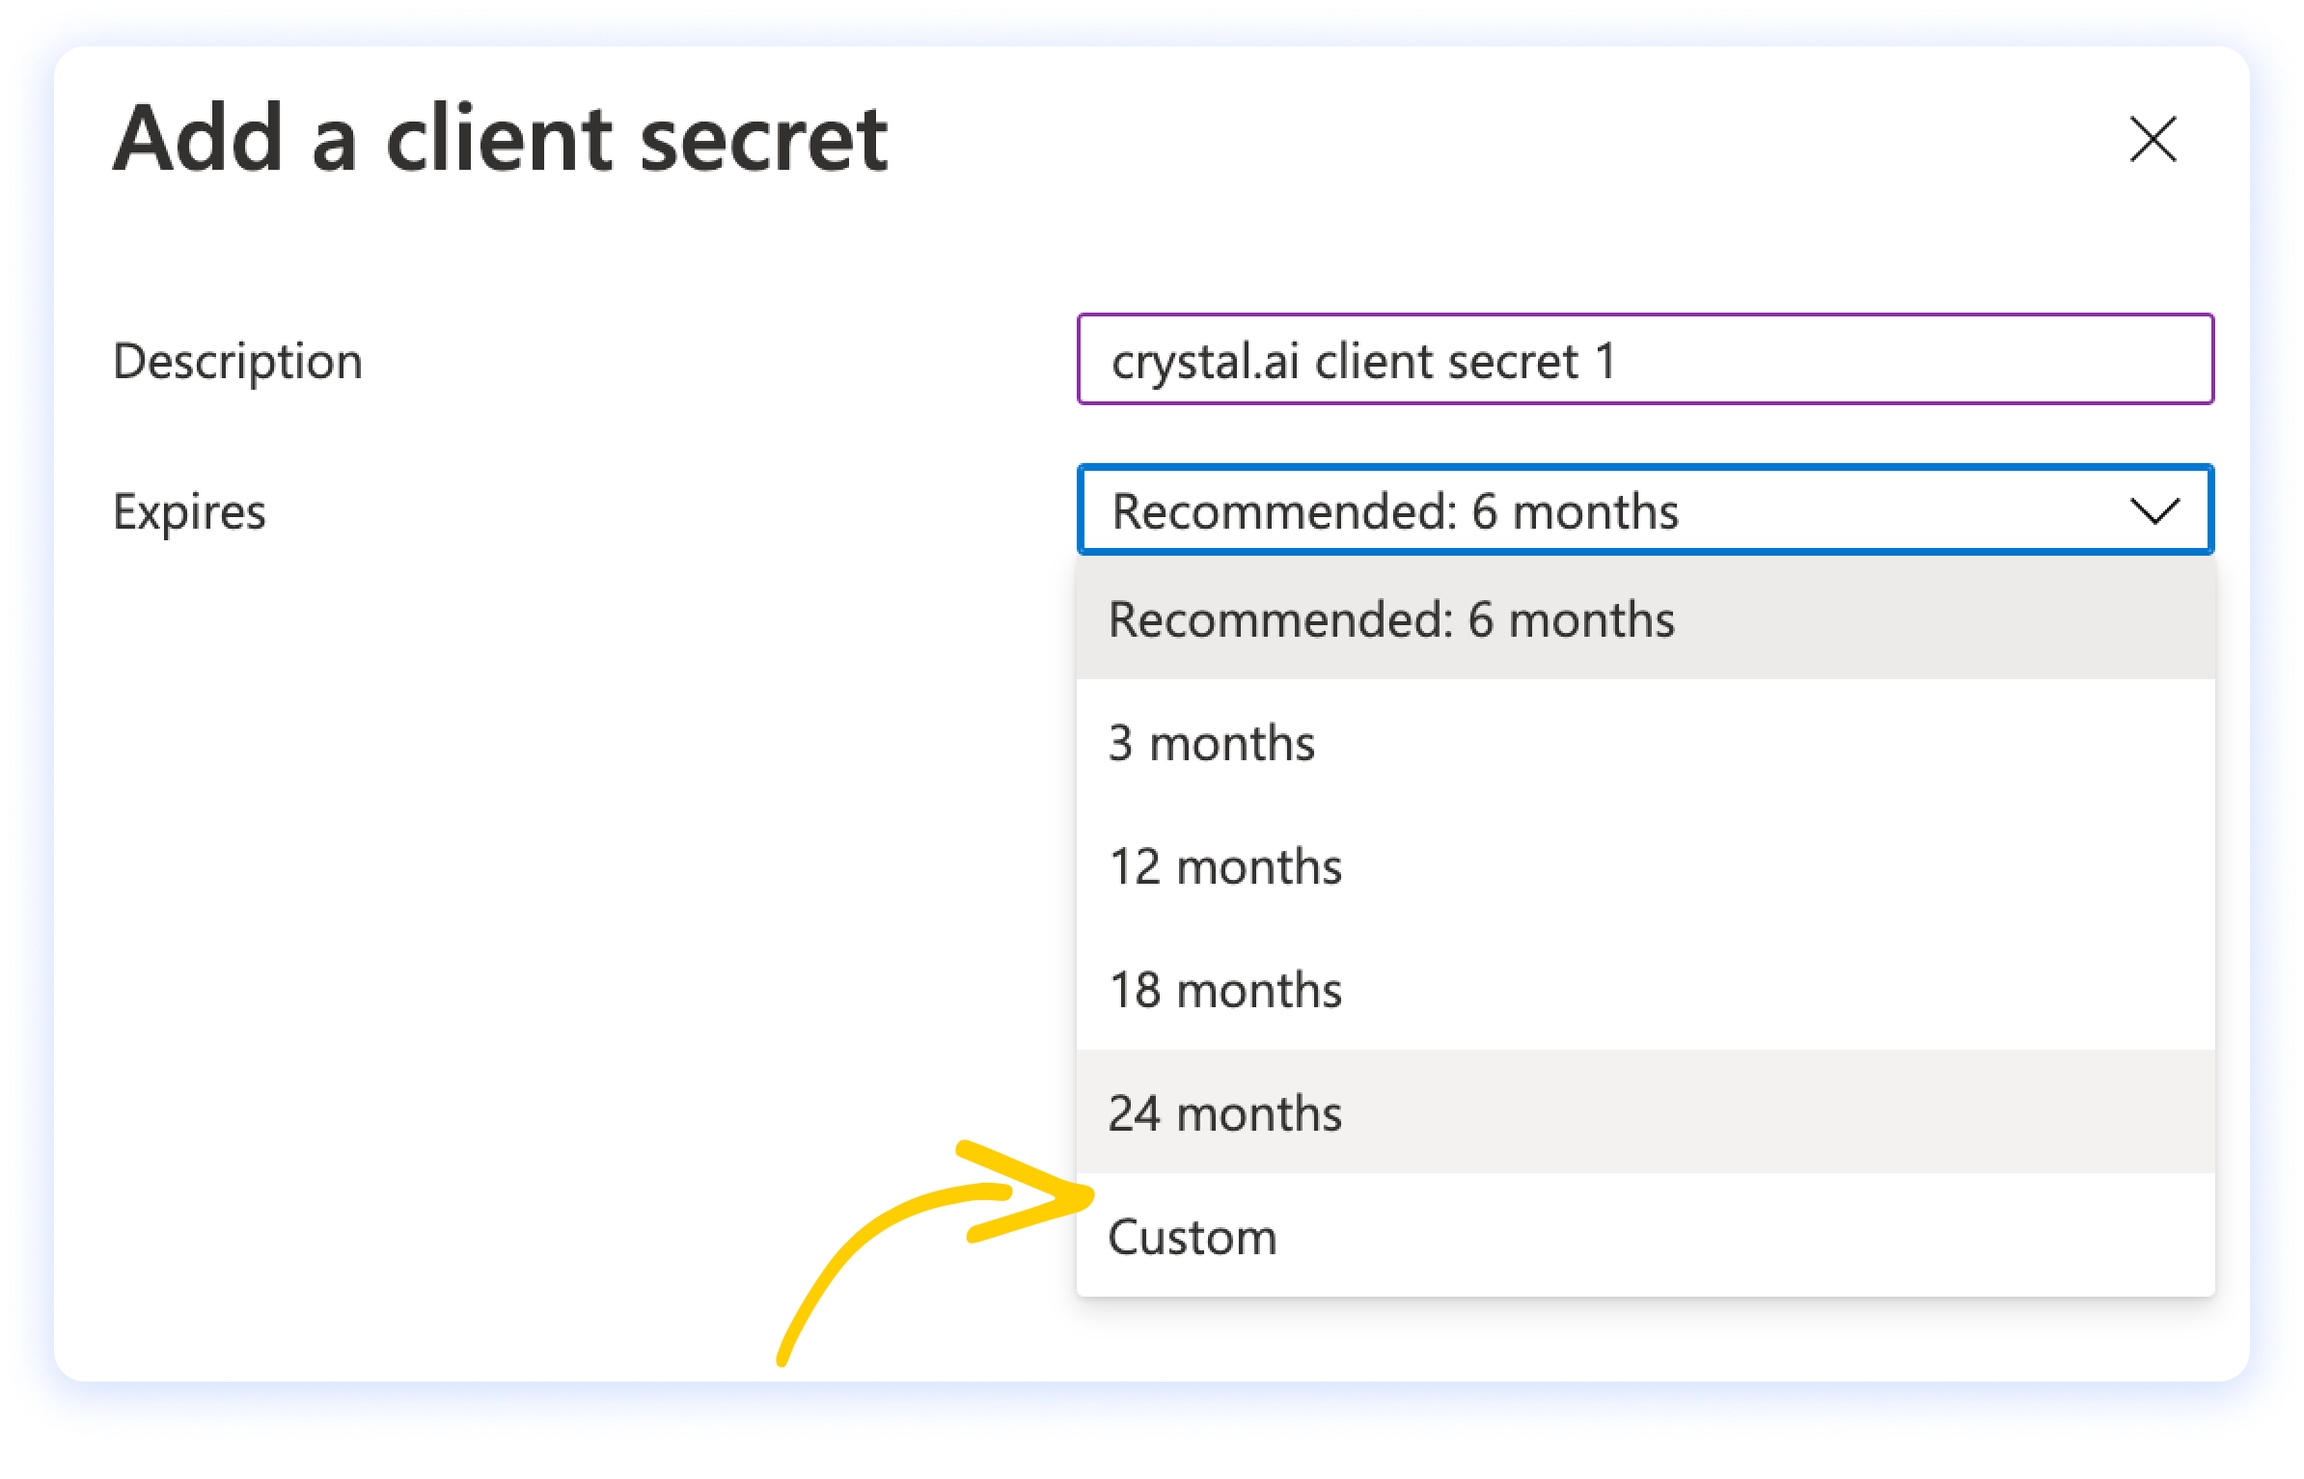
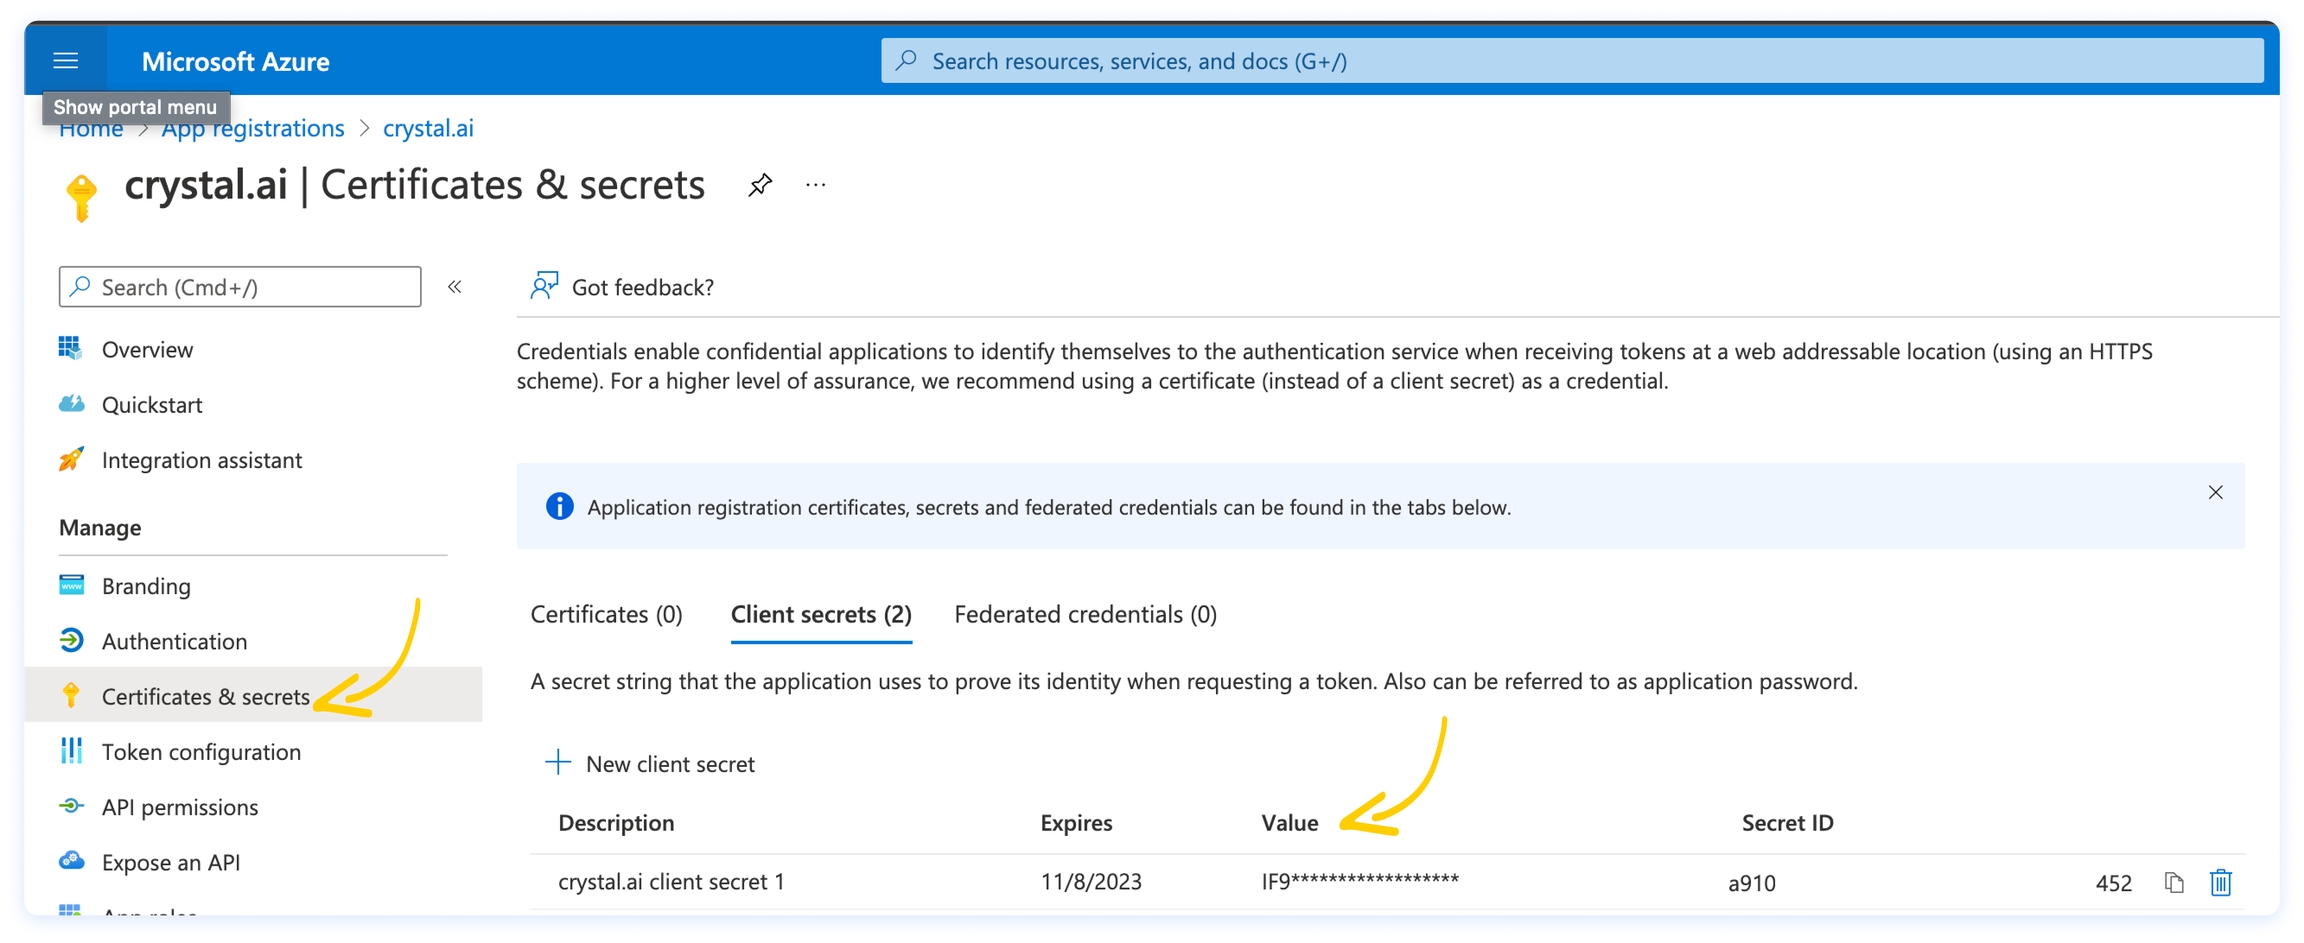
Copy the secret value and keep it somewhere safe: you will need it later, when you will configure crystal in Step 4 (it’s the Secret Code in the IDP form).

Step 3 - Give the proper API permissions to the App
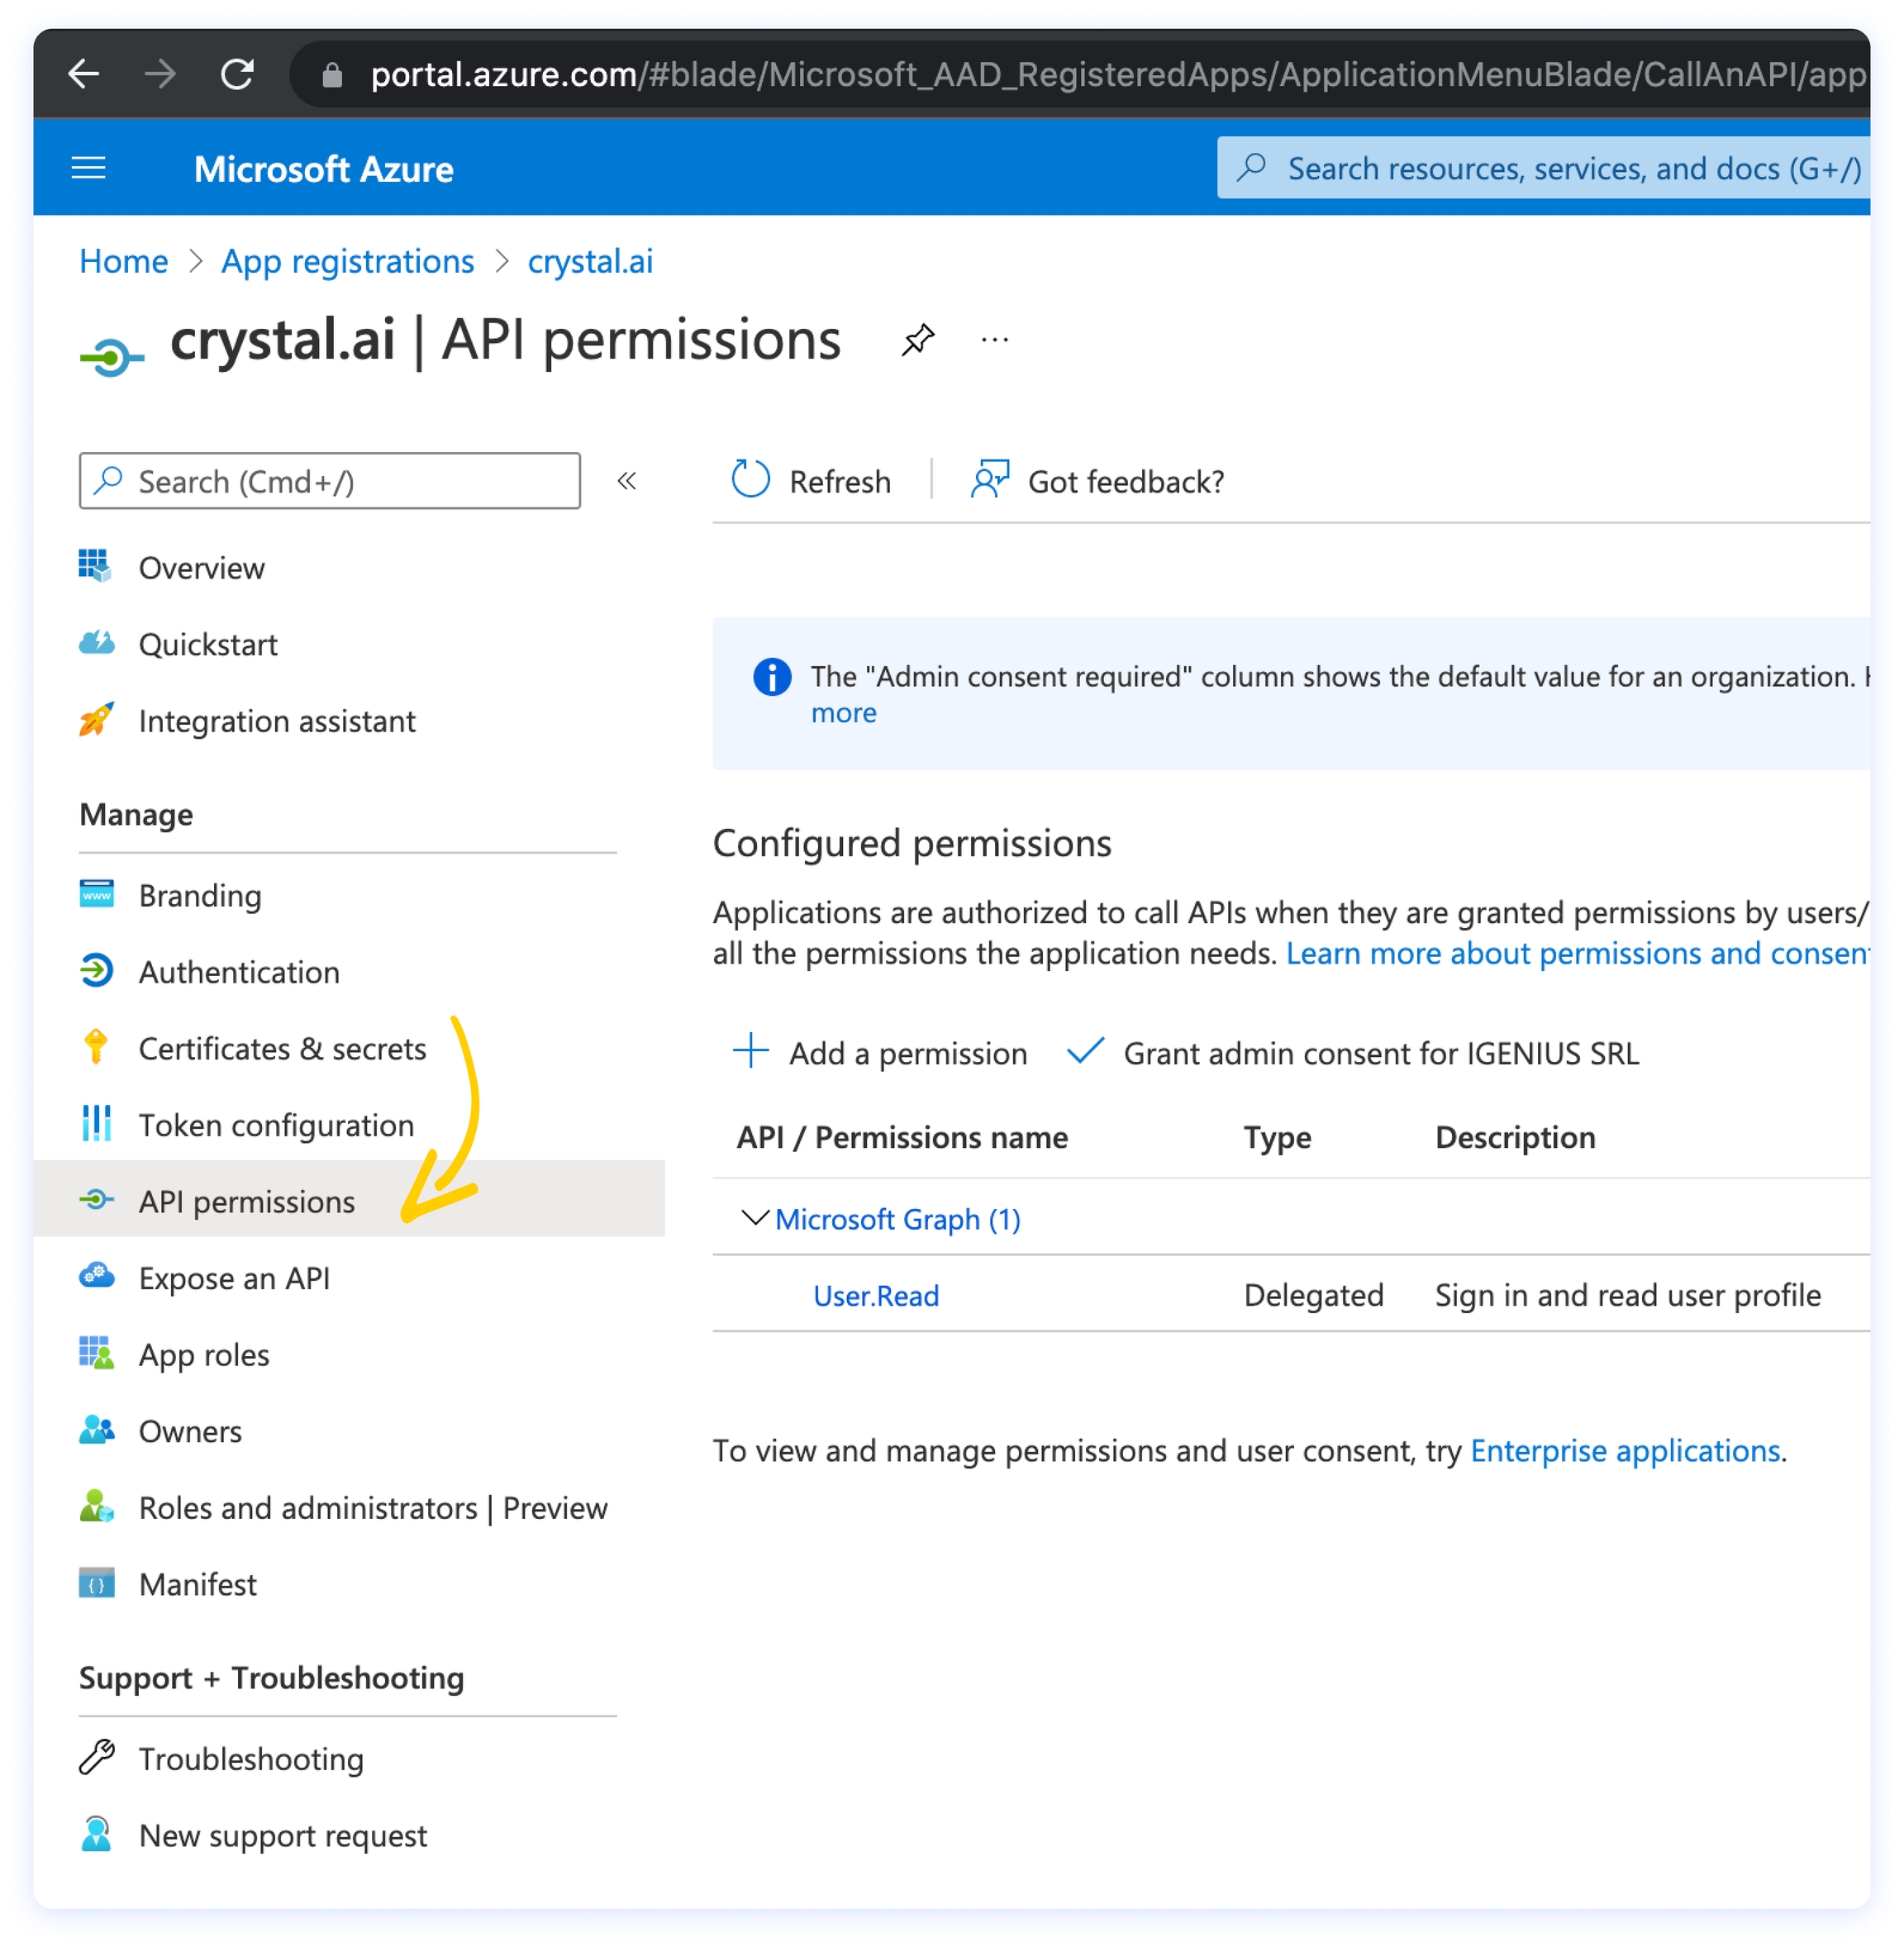
On the left menu, click on API permissions. You should see the User.Read permission already configured. Click on +Add a permission.
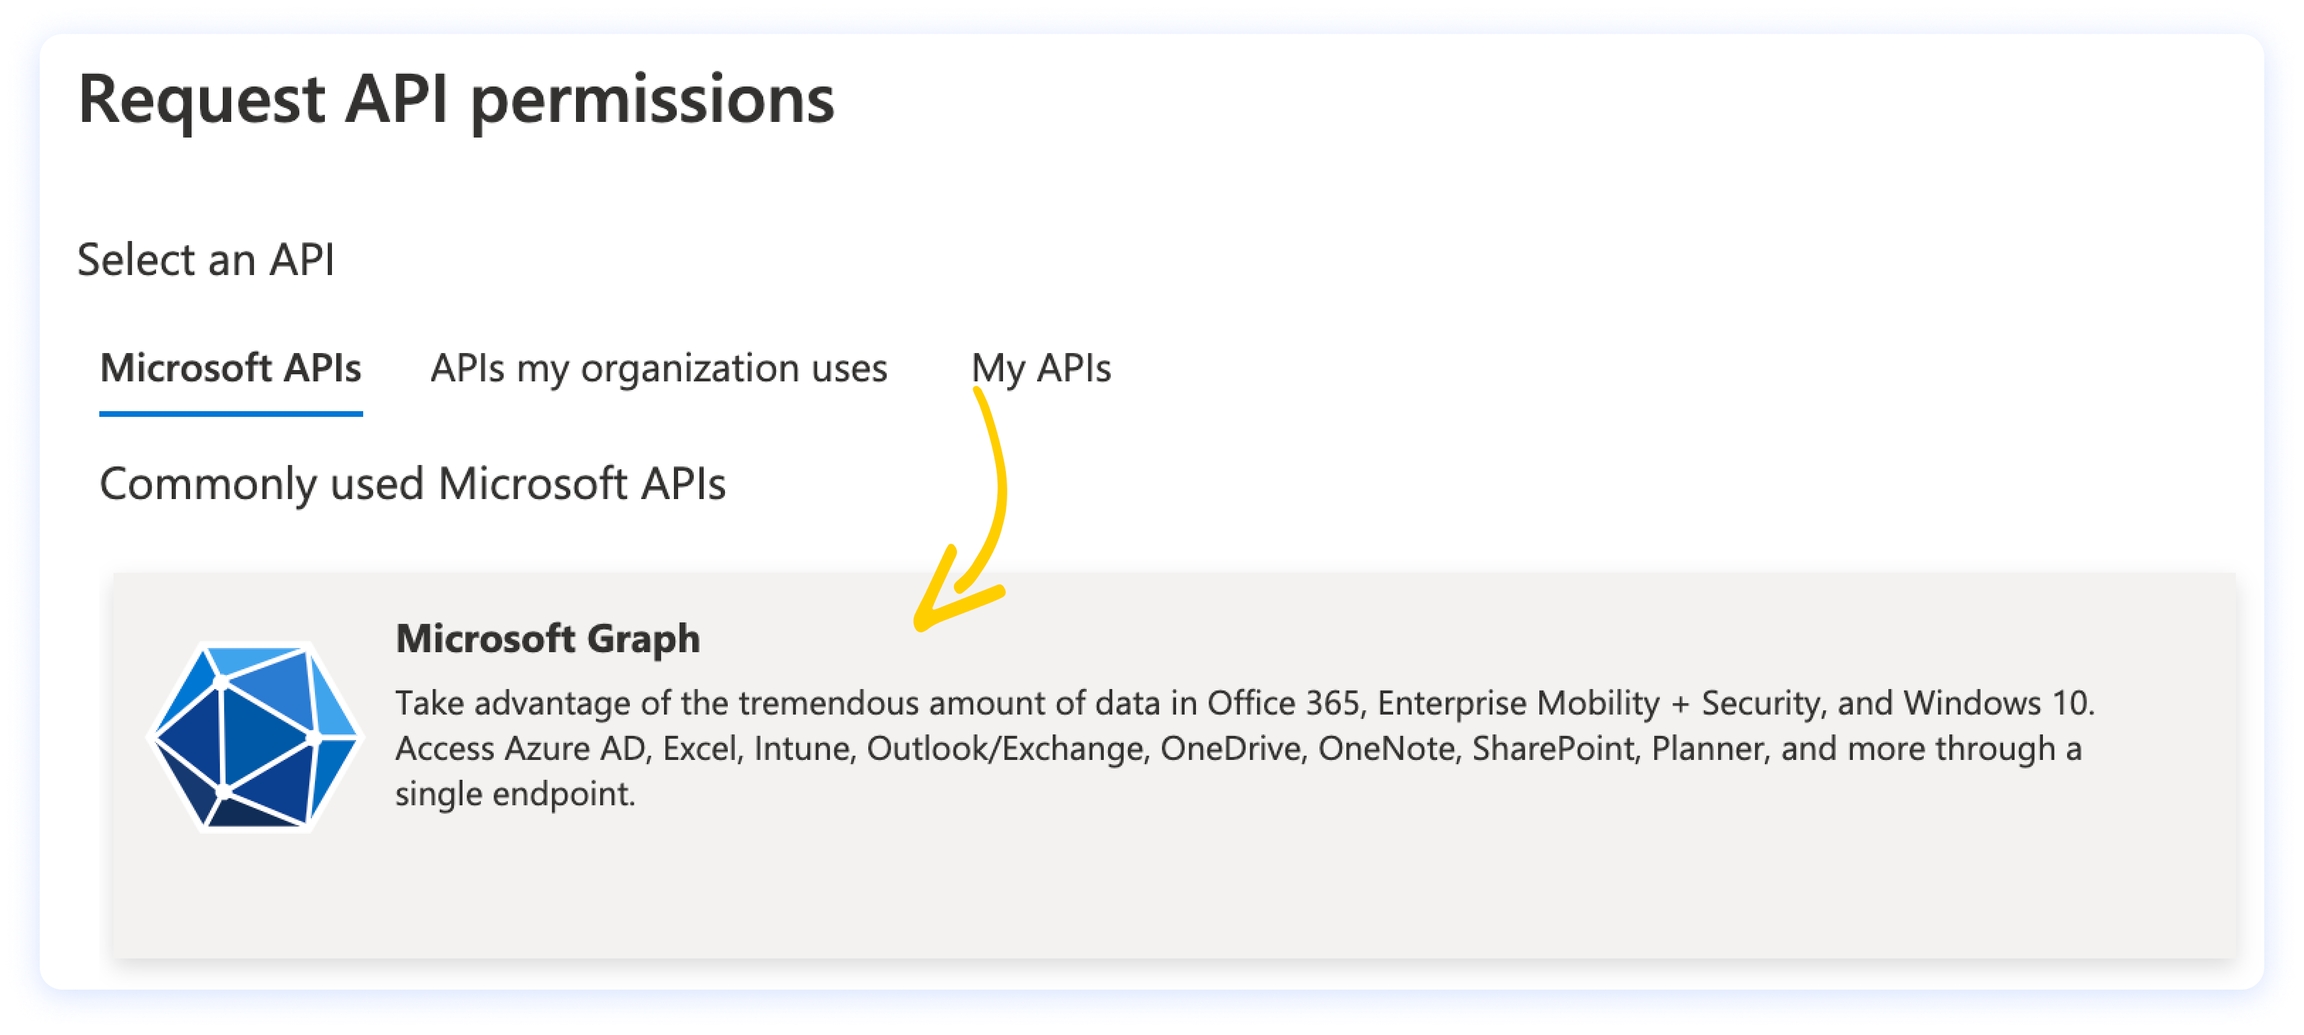
Now click on the Microsoft Graph banner.
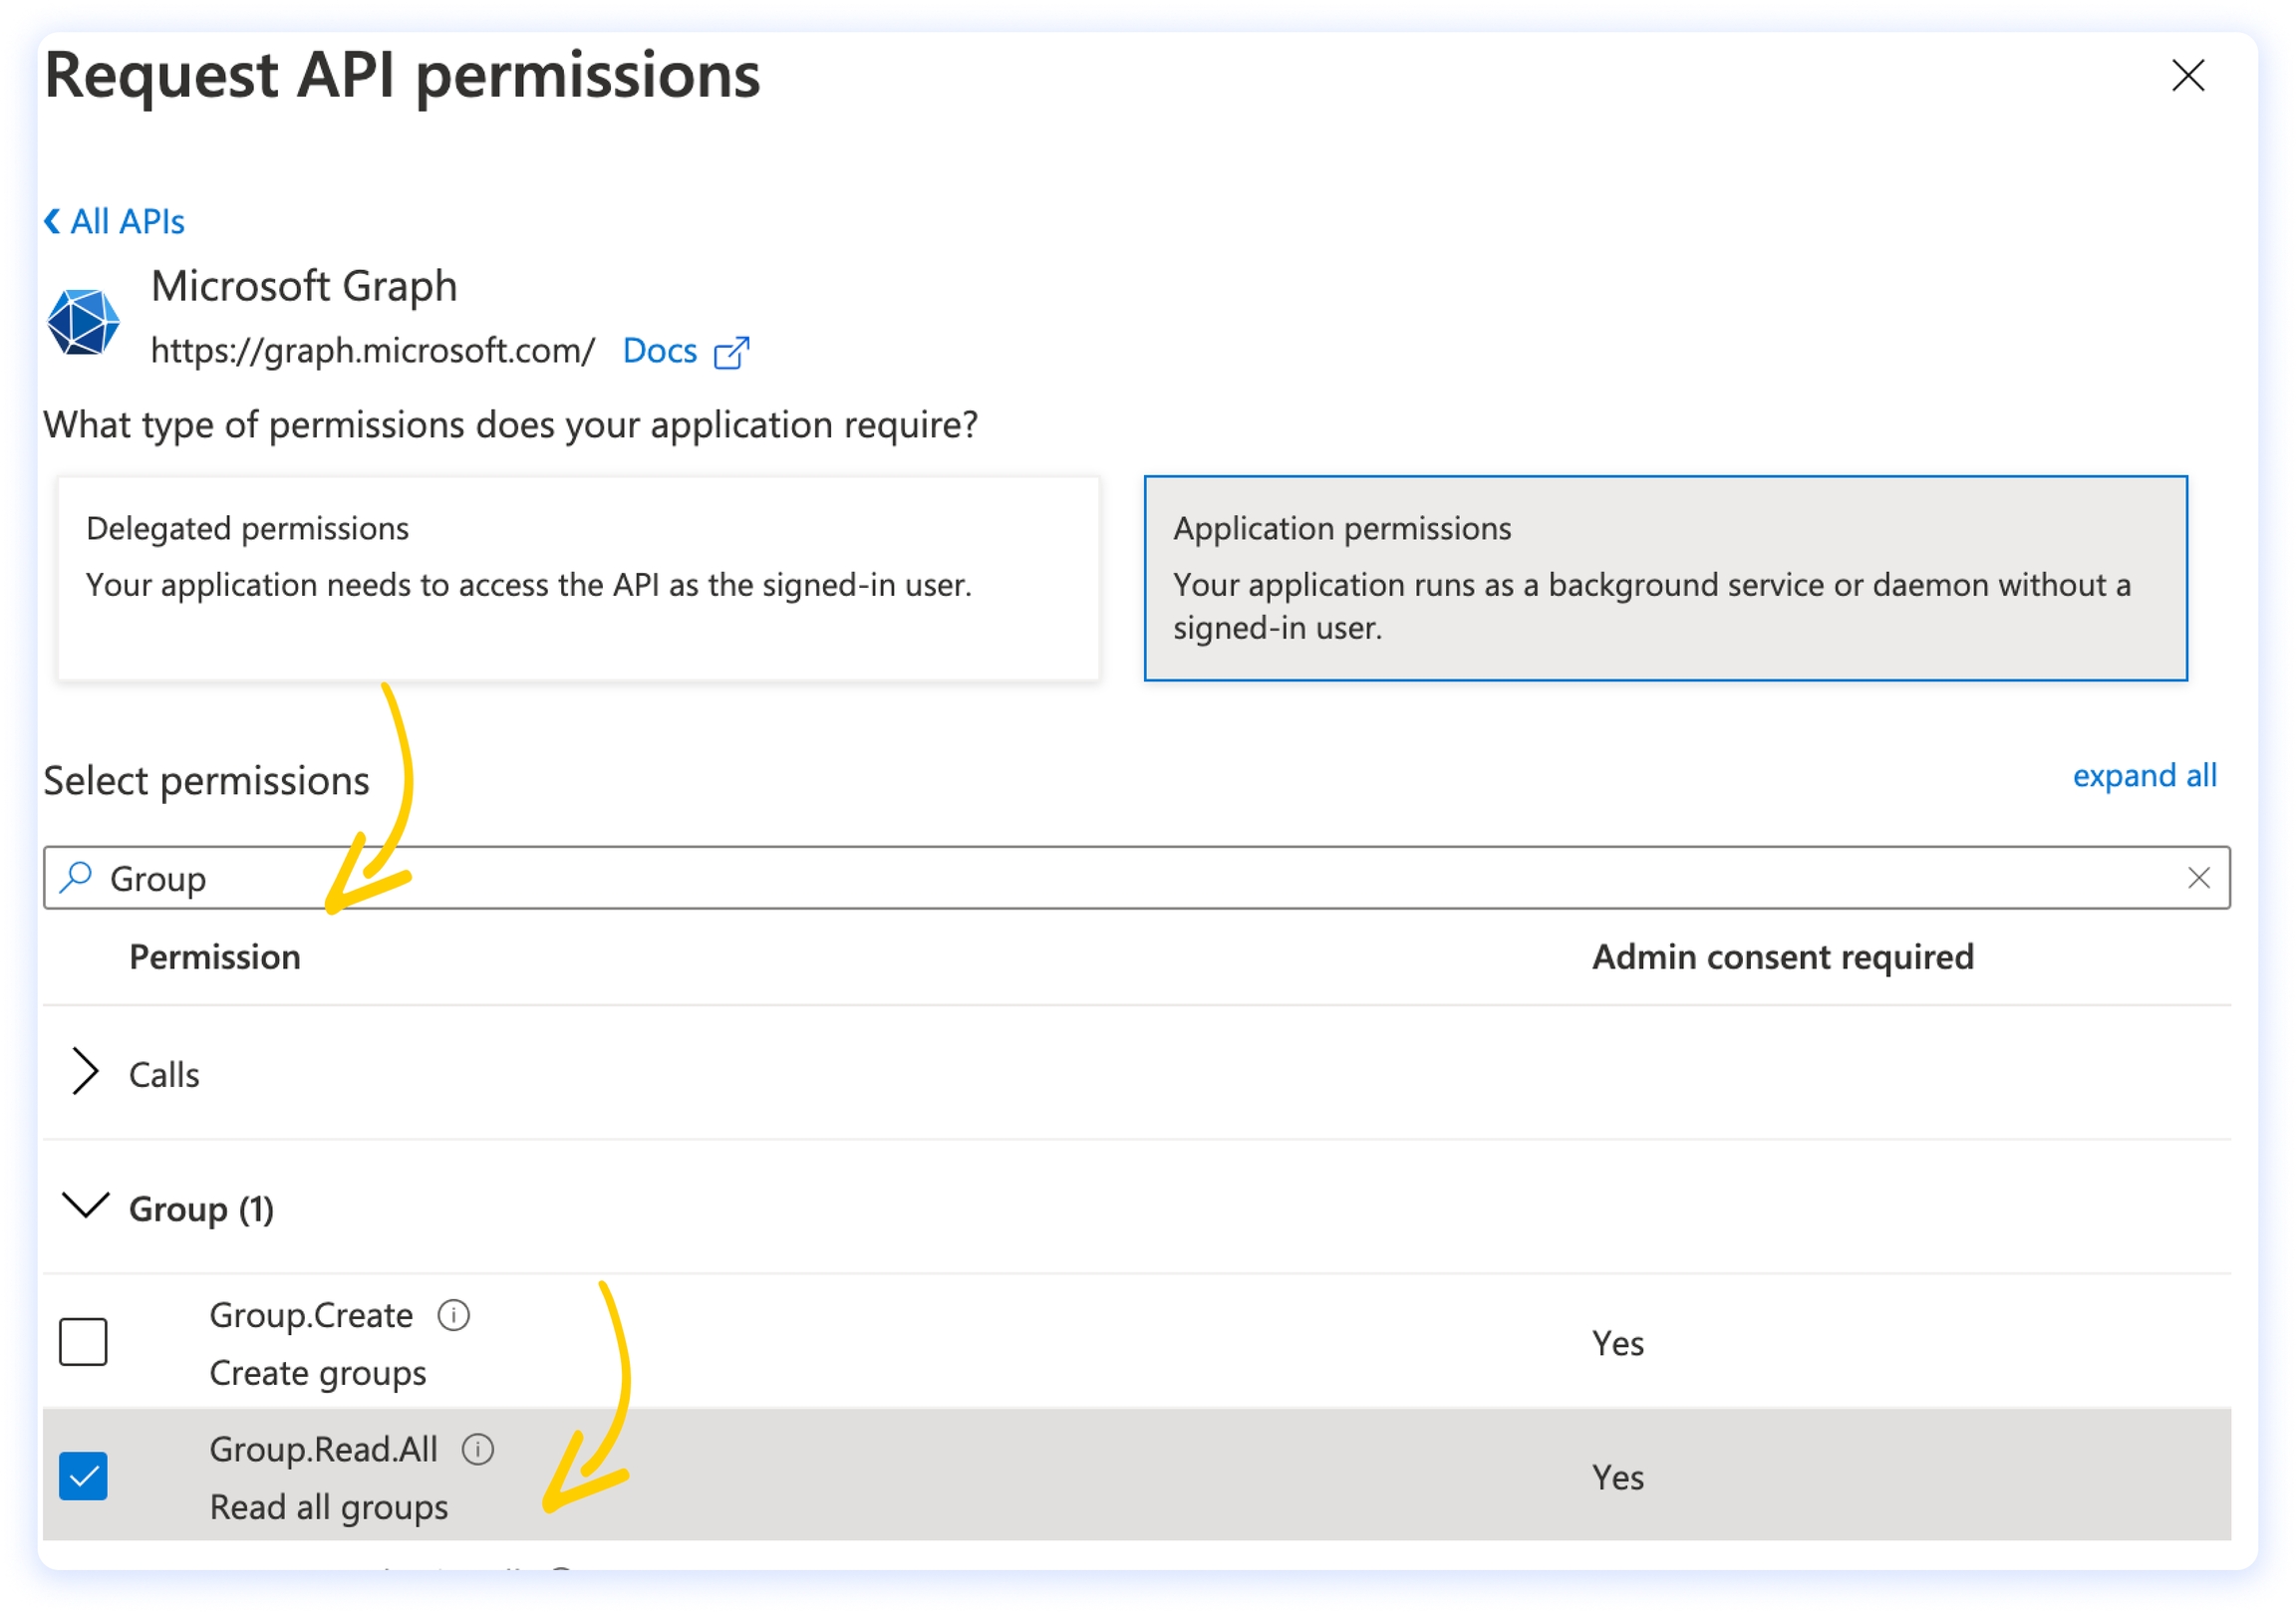
Click on Application permissions and search for Group, then flag the option Group.Read.All permission.
If you’re not the directory administrator, you should see an orange sign on the status (instead of a green circle). In this case you should ask your admin to consent to the newly added permissions. If, instead, you’re the admin, you can grant them by clicking on Grant admin consent for.

Step 4 - Configure the Microsoft Azure IDP in the crystal Console
Log in to the crystal Self-Service Console and go to the Users tab. Click on the Identity Provider label, then click on Add new IDP.


Select Azure Active Directory.
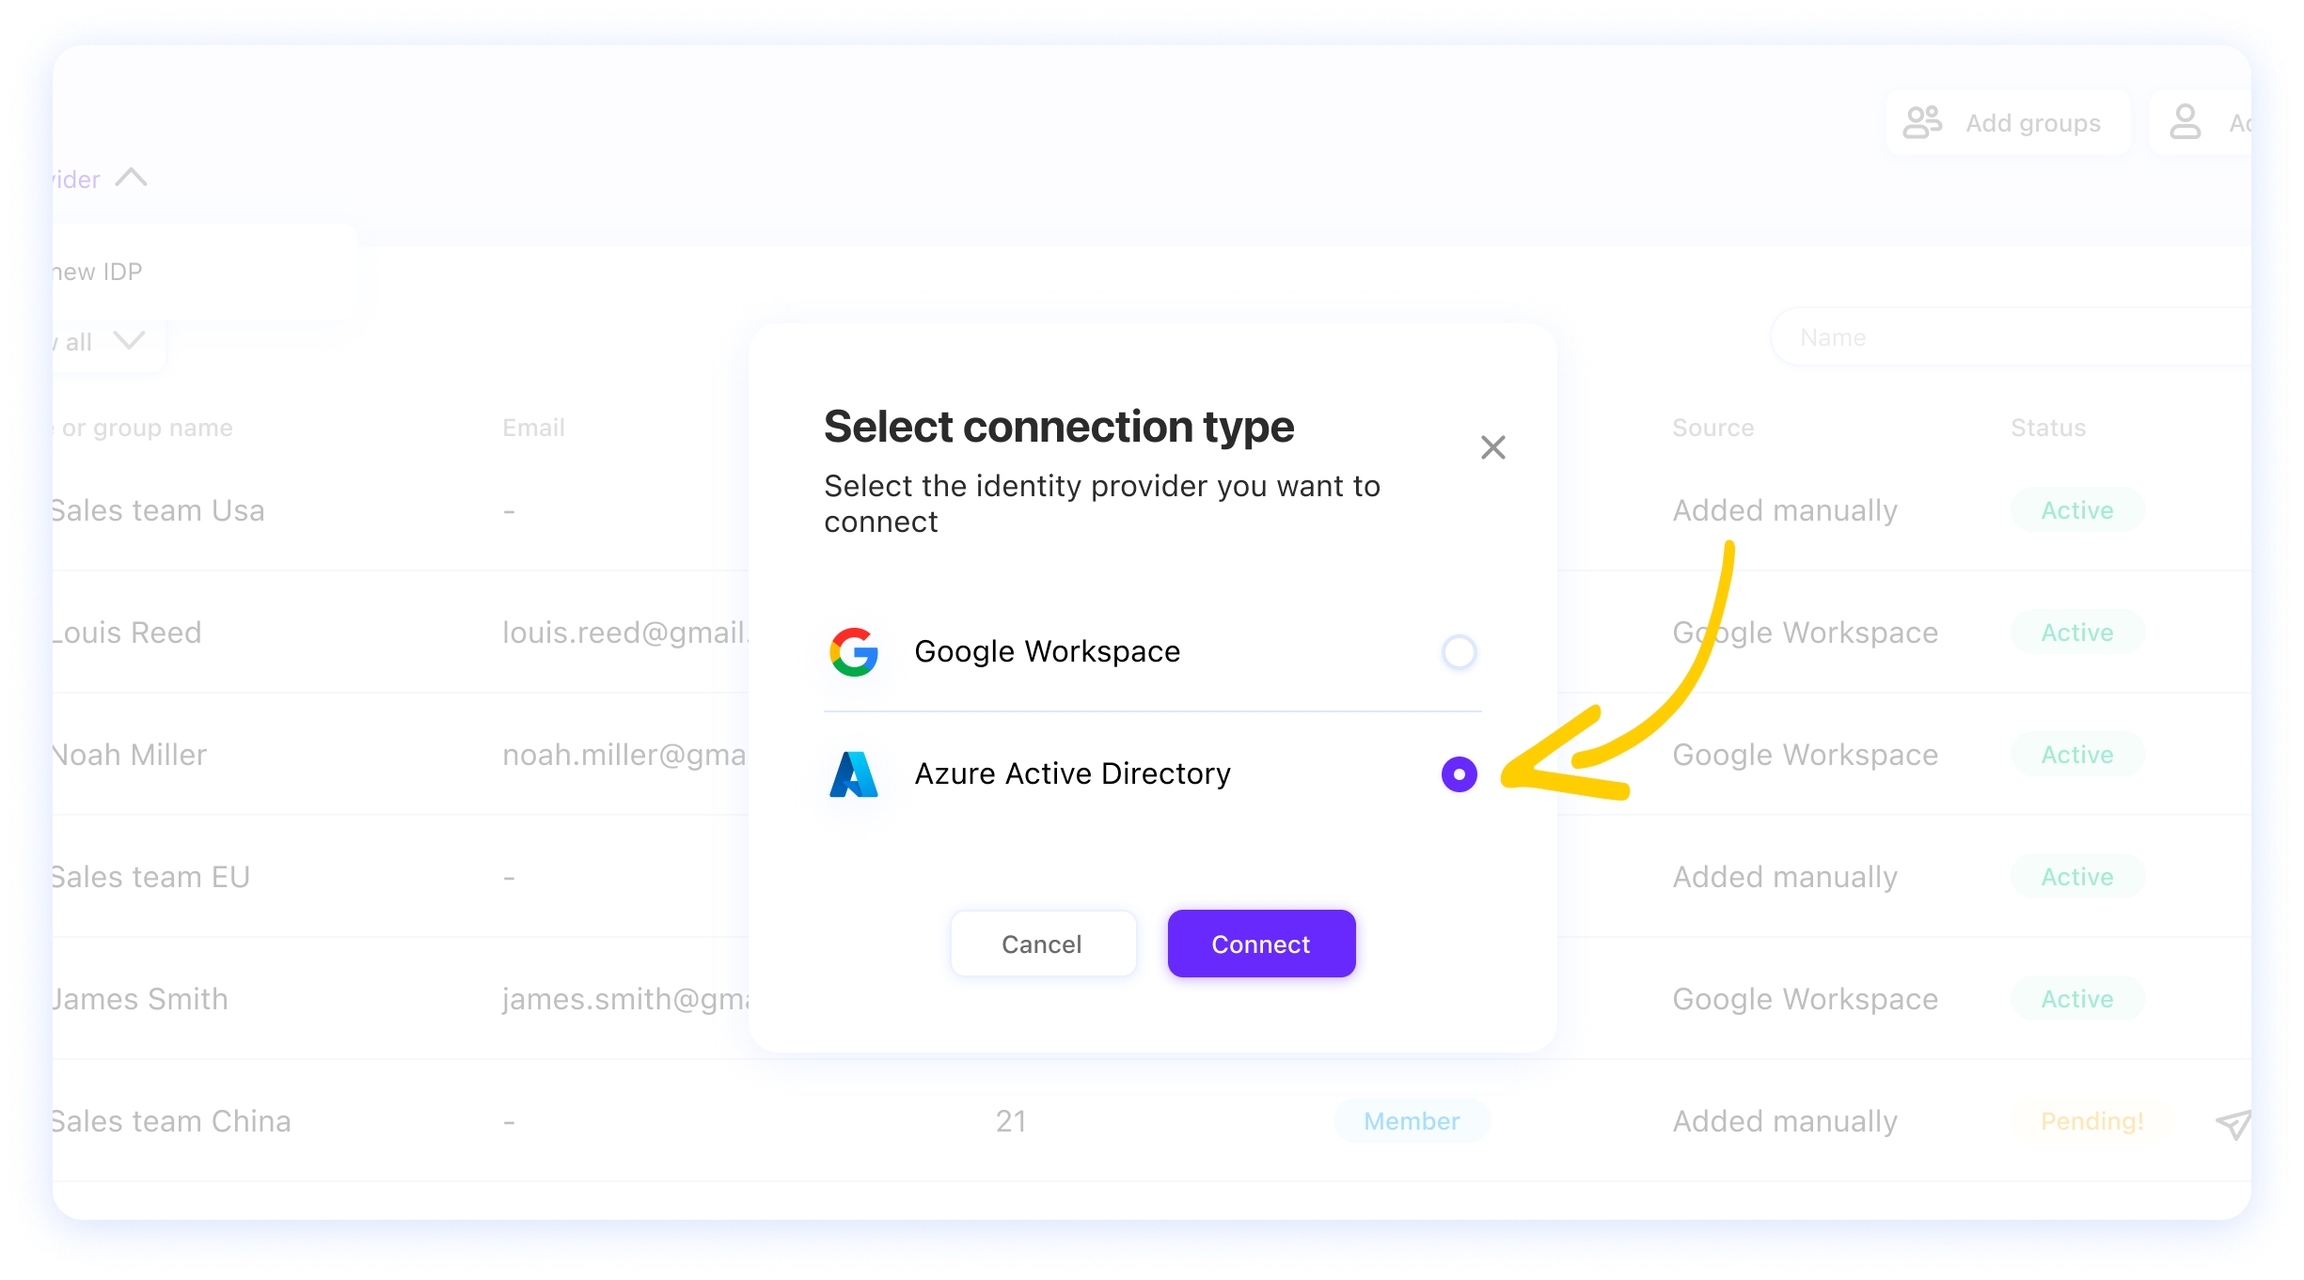
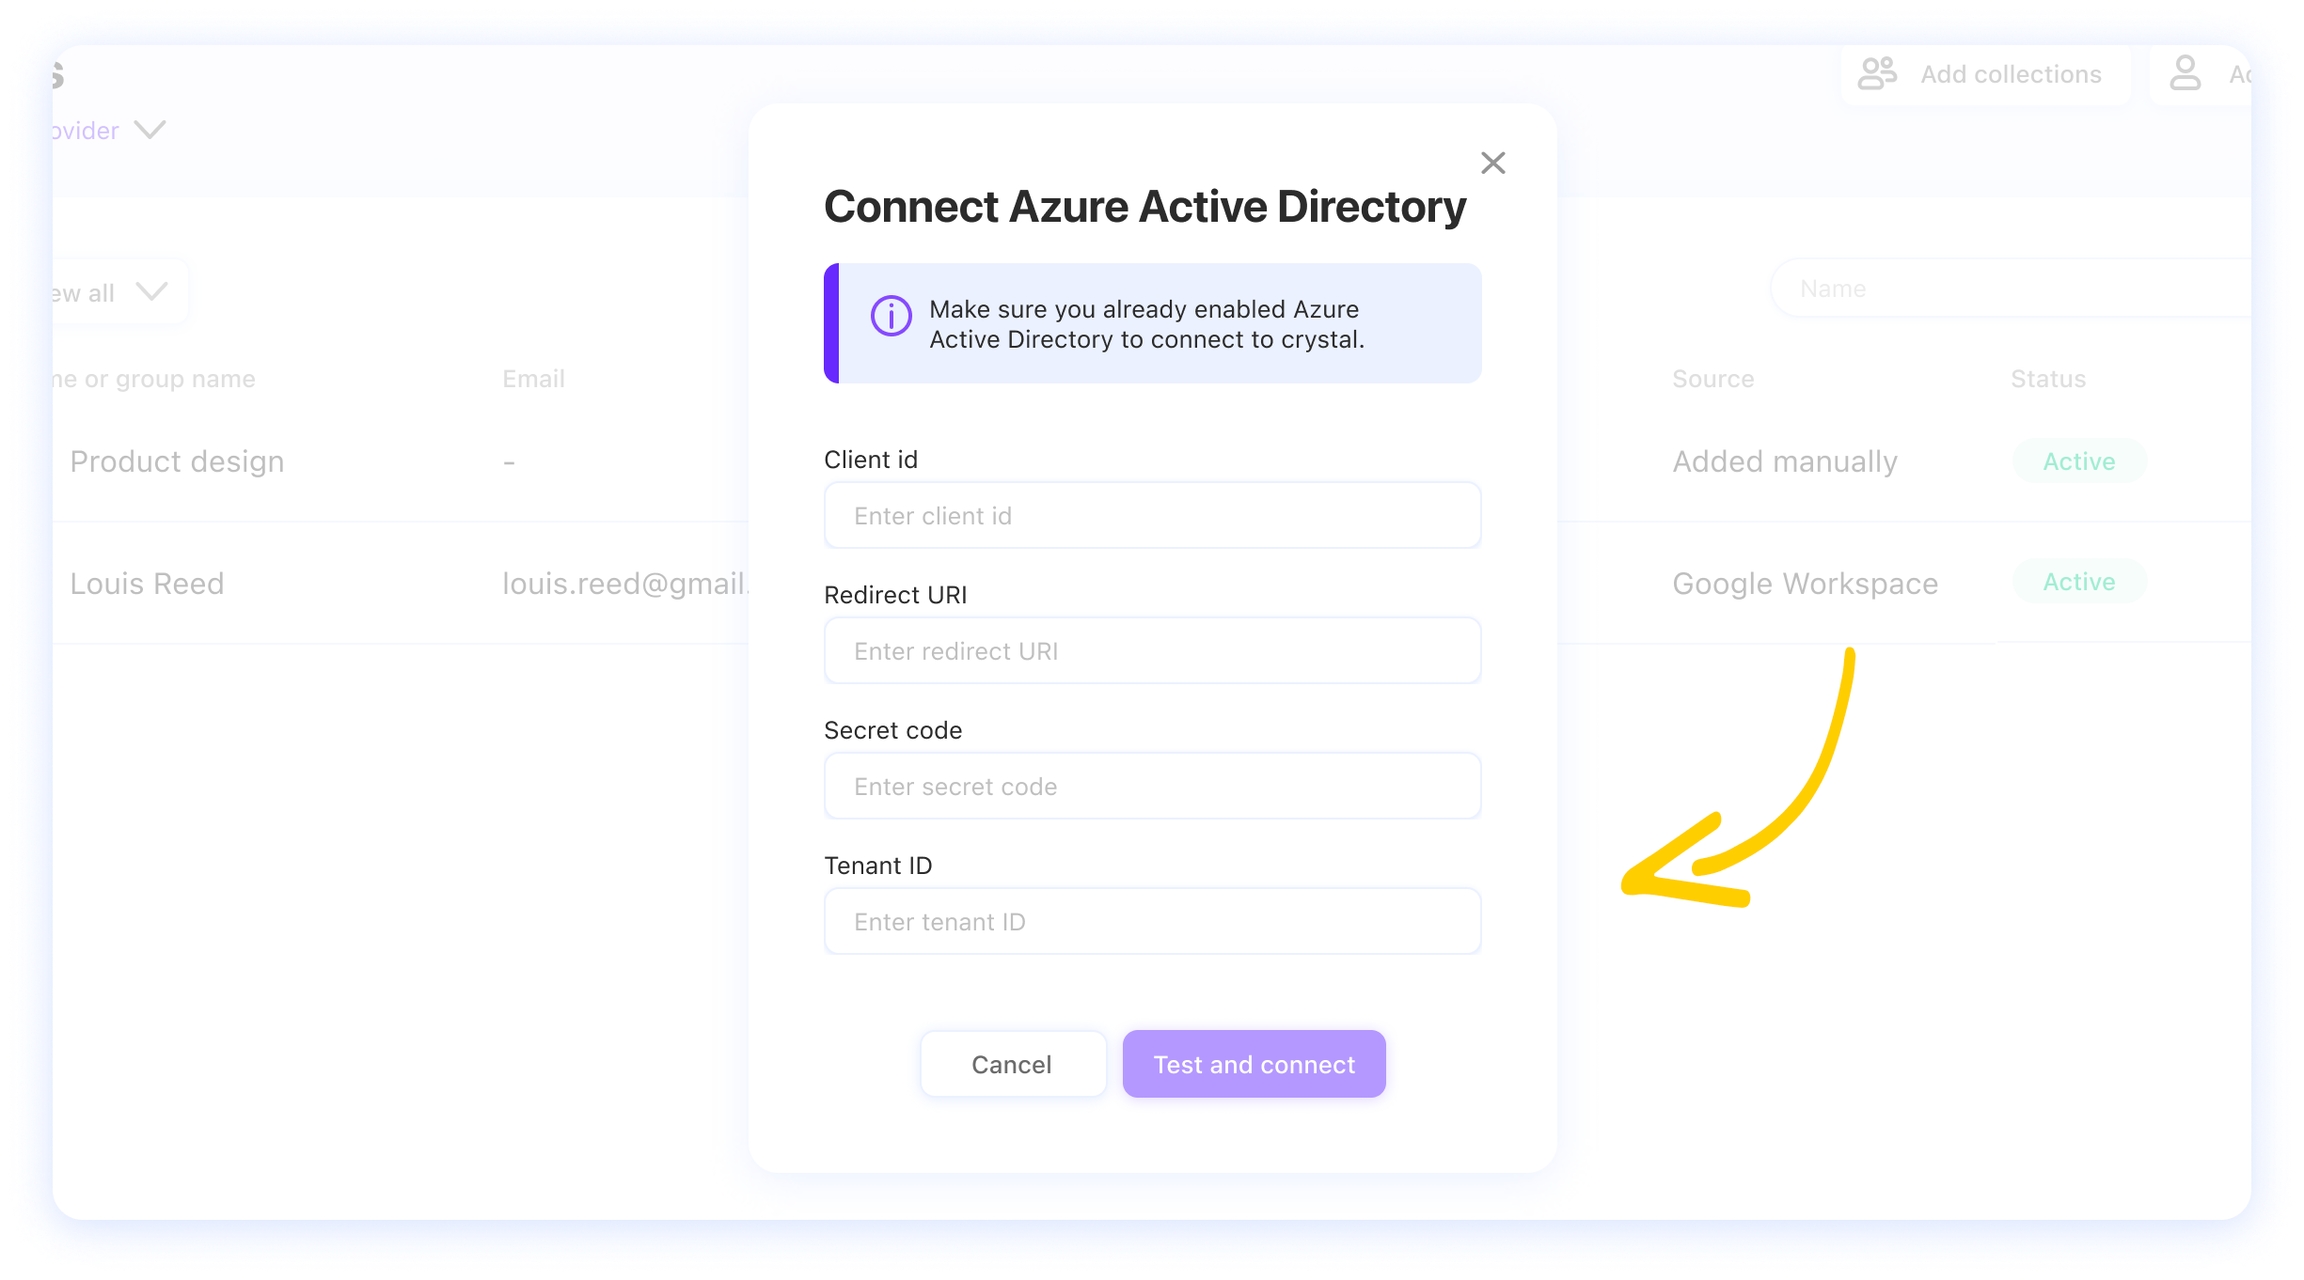
Now you need to fill in the form with the App registration credentials you configured in the previous steps of this guide.
Here is where you can find the credentials you need:
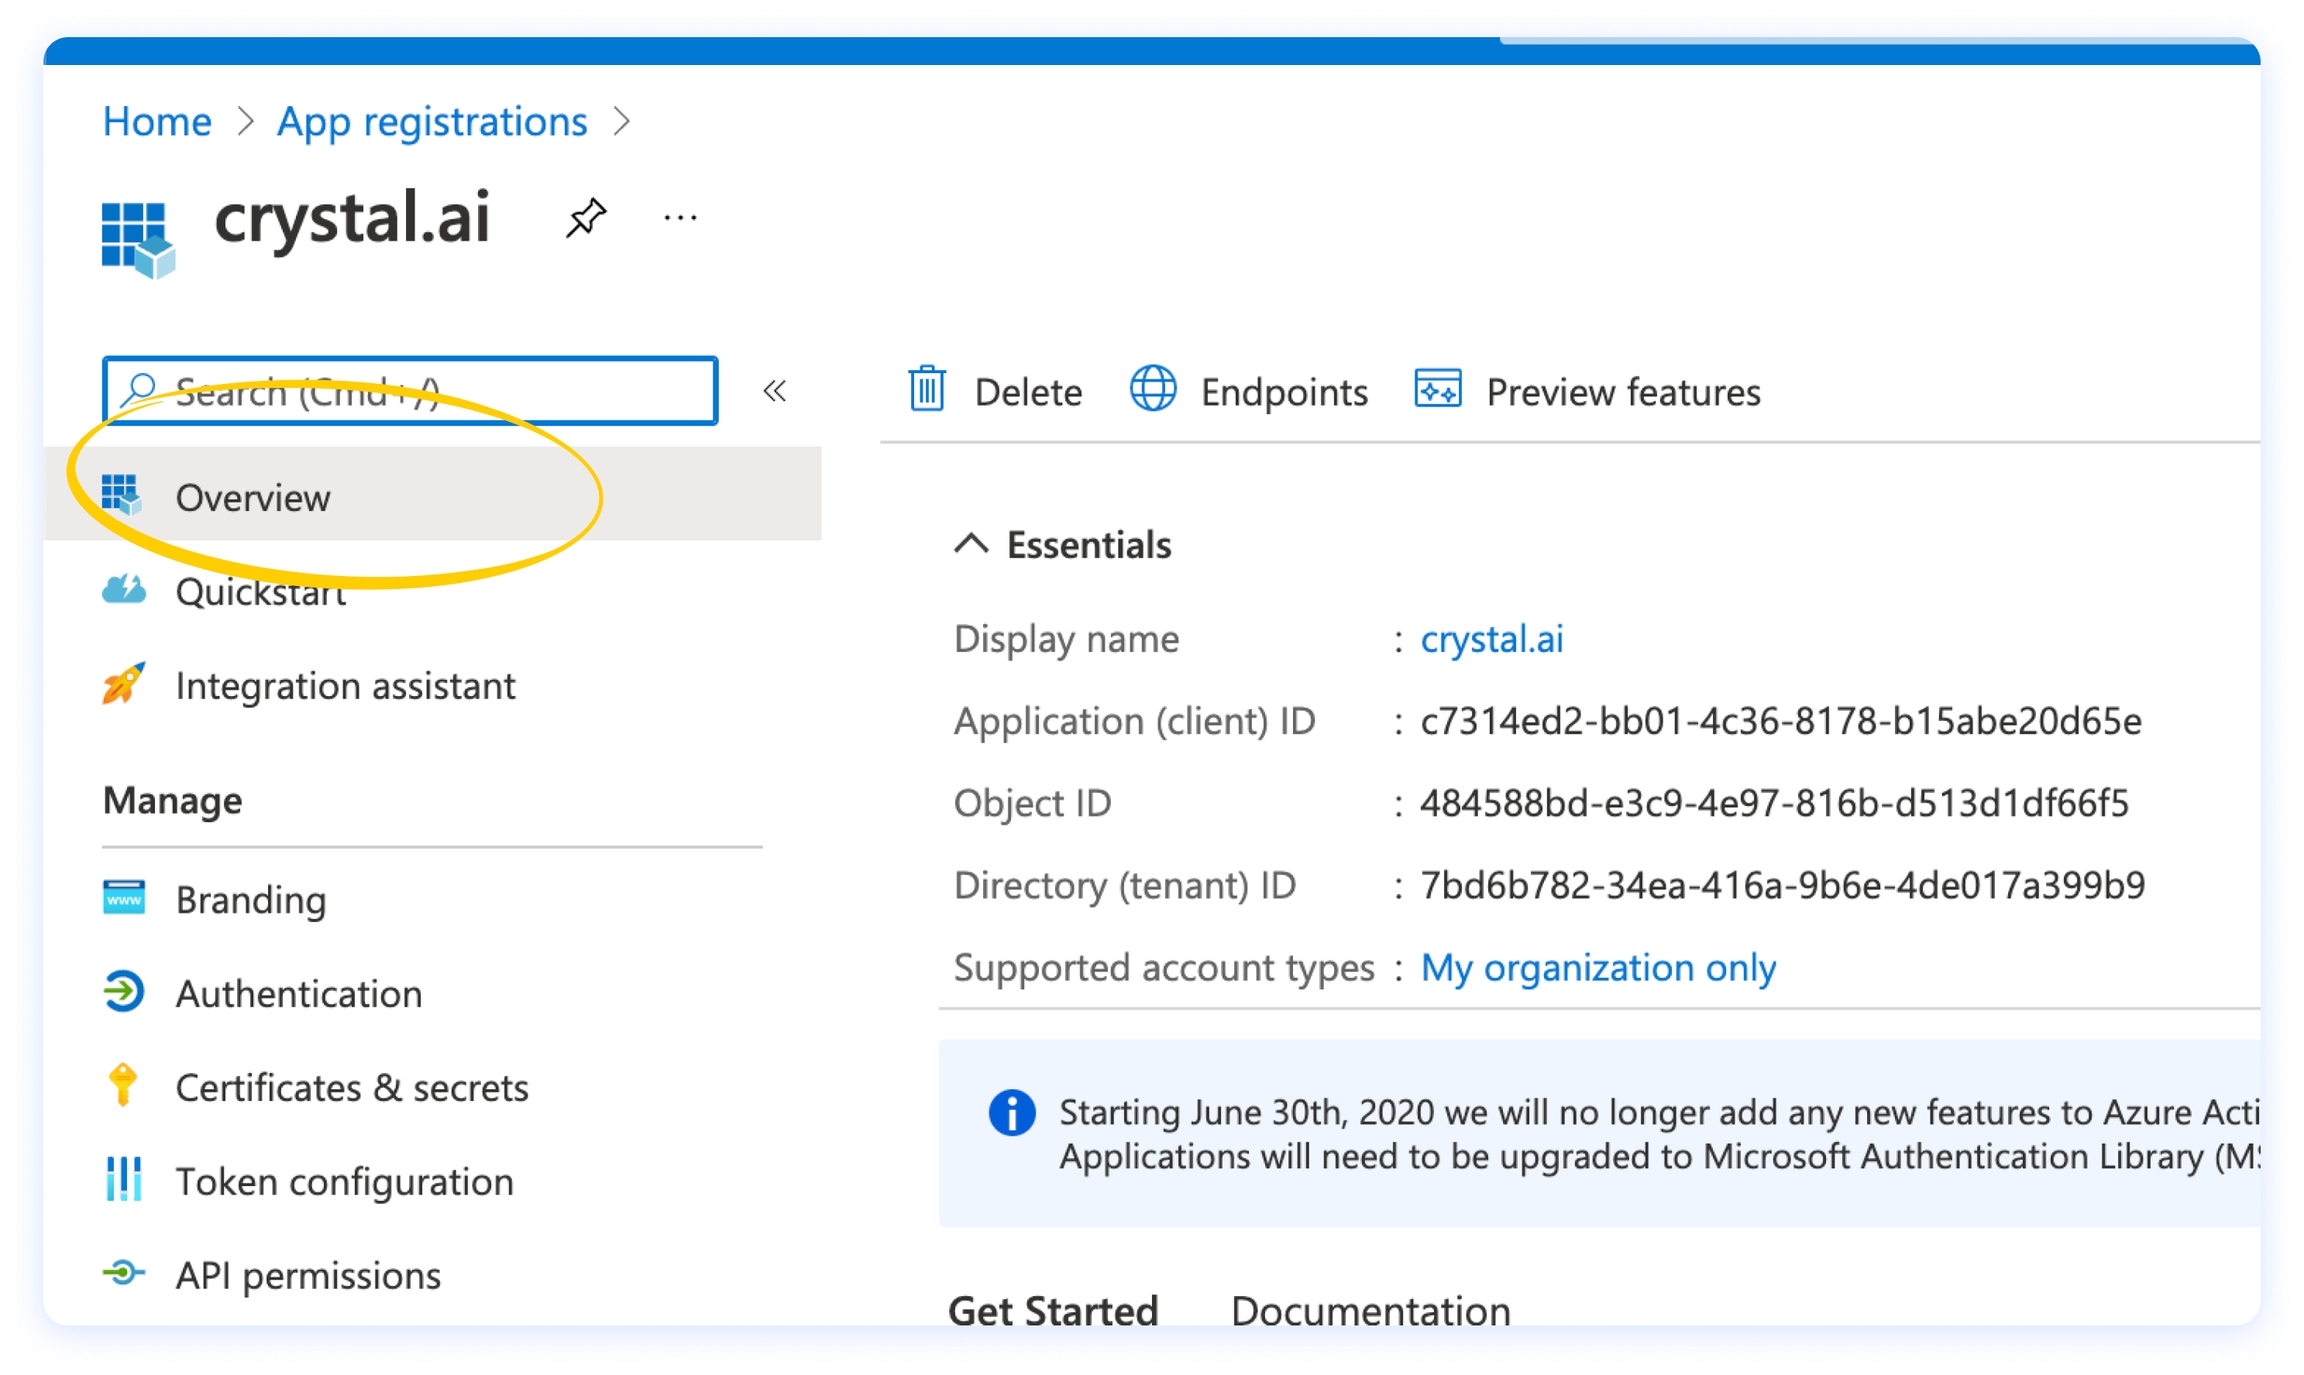
You will find Client ID and Tenant ID by clicking on Overview from the left menu of your crystal app registration on the Azure portal.
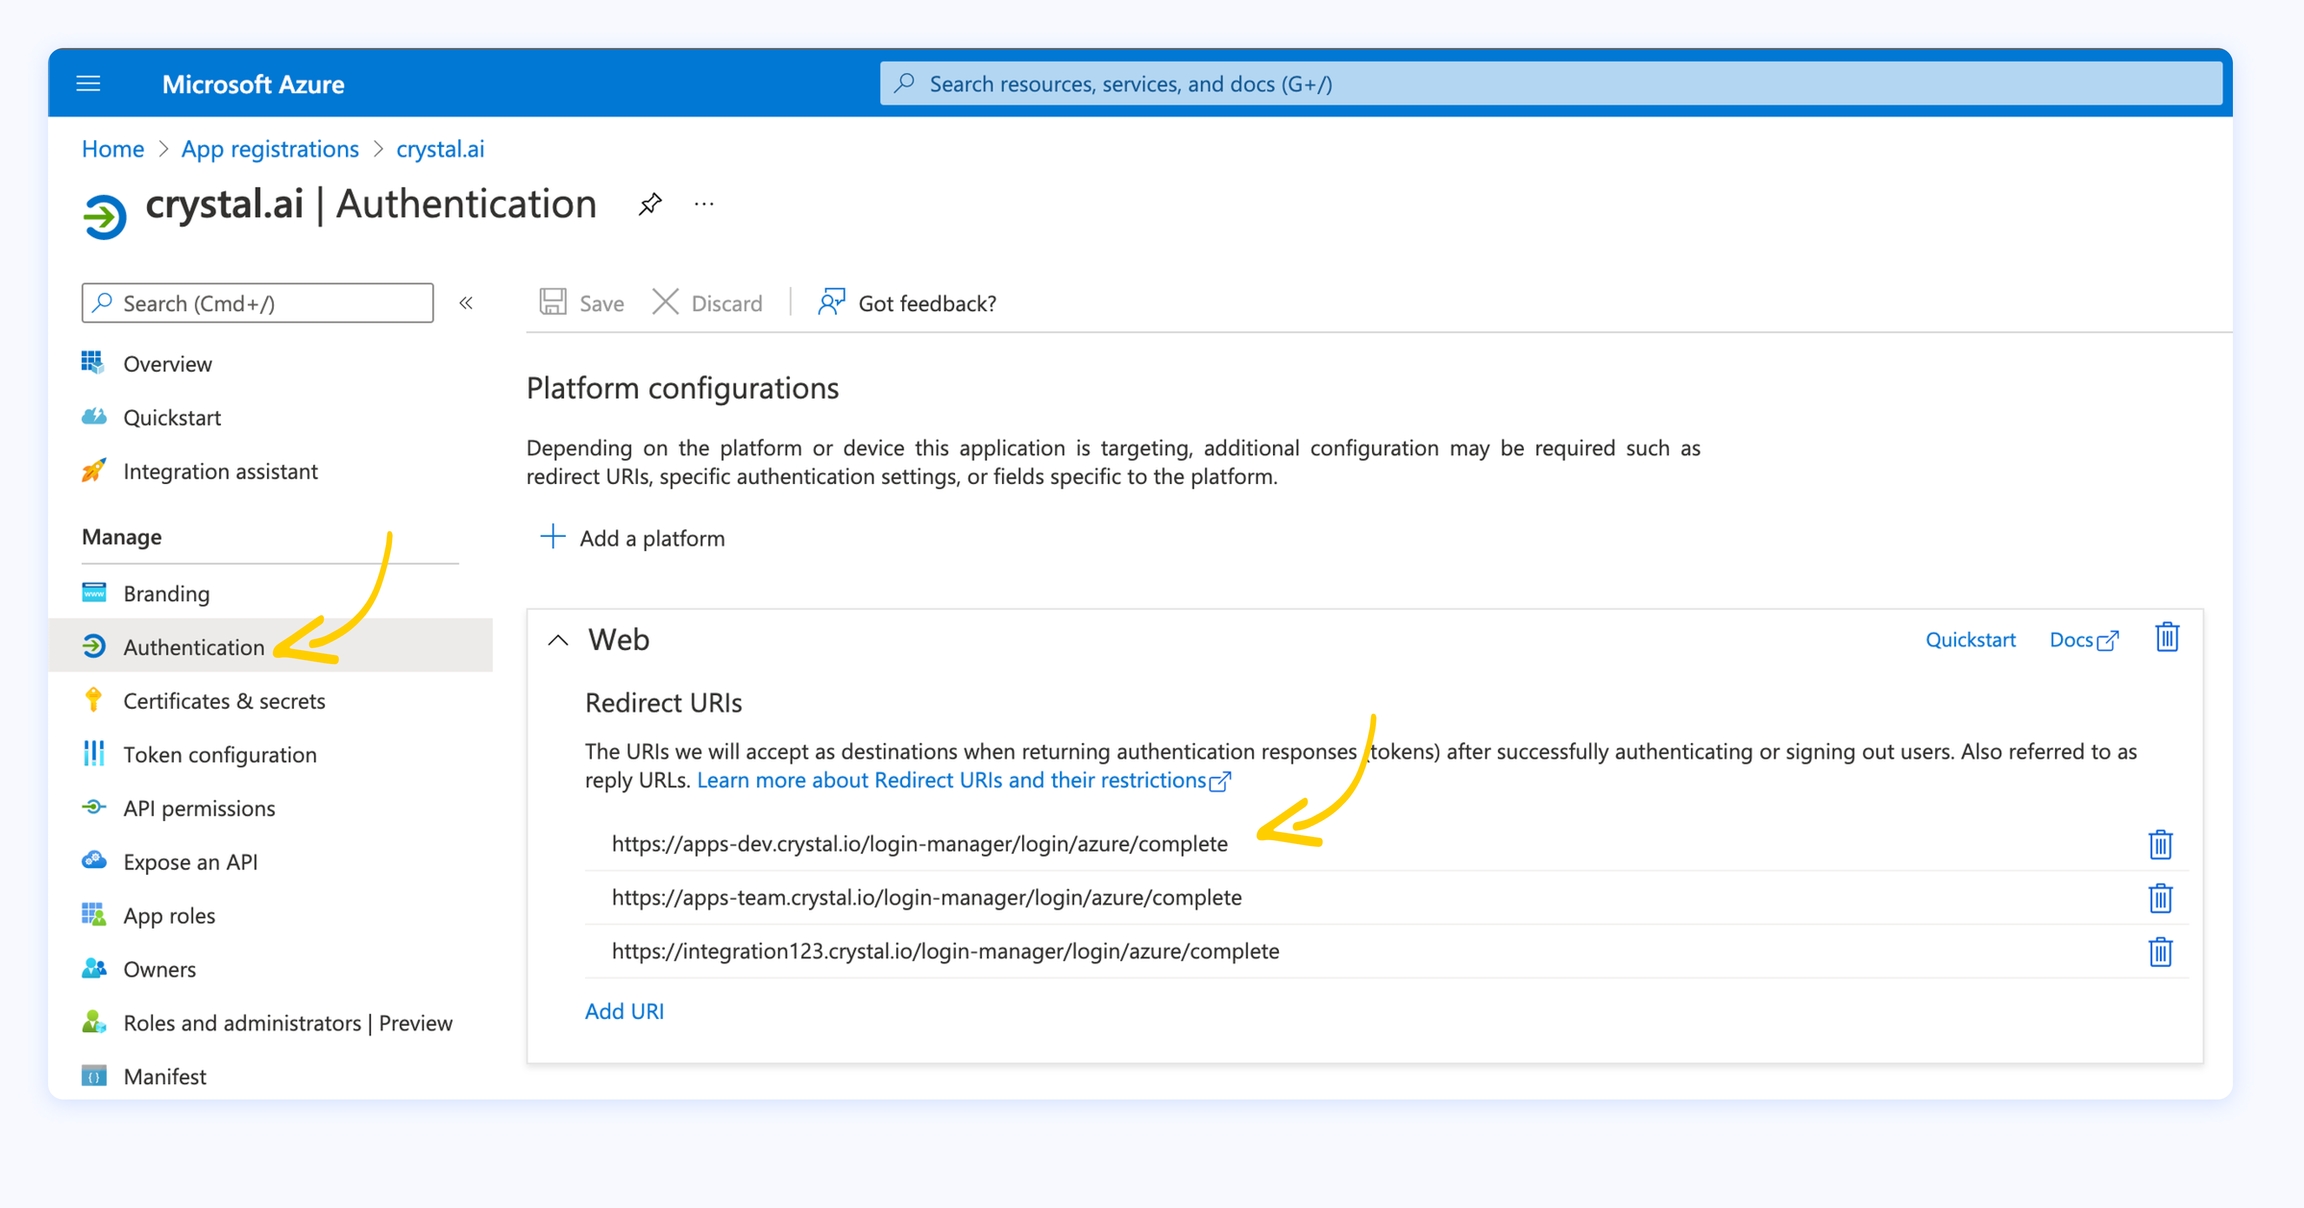
2. You can find the Redirect URI by clicking on Authentication from the left menu of your crystal app registration on the Azure portal. It must be the same and the structure must be https://{your-crystal-tenant-name}.crystal.ai/login-manager/login/azure/complete.
3. The Secret Code can be found by clicking on Certificates & Secrets from the left menu of your crystal app registration on the Azure portal. Mind that, if you didn’t save it before, you will have to create a new one.
Once the form is filled with the above mentioned credentials, click on Test and Connect.
If the connection succeeds, you’ll be capable to invite Users from Azure and enable the Login via Microsoft credentials for them (and to easily create new groups).
Last updated
Was this helpful?